Make a menu slide
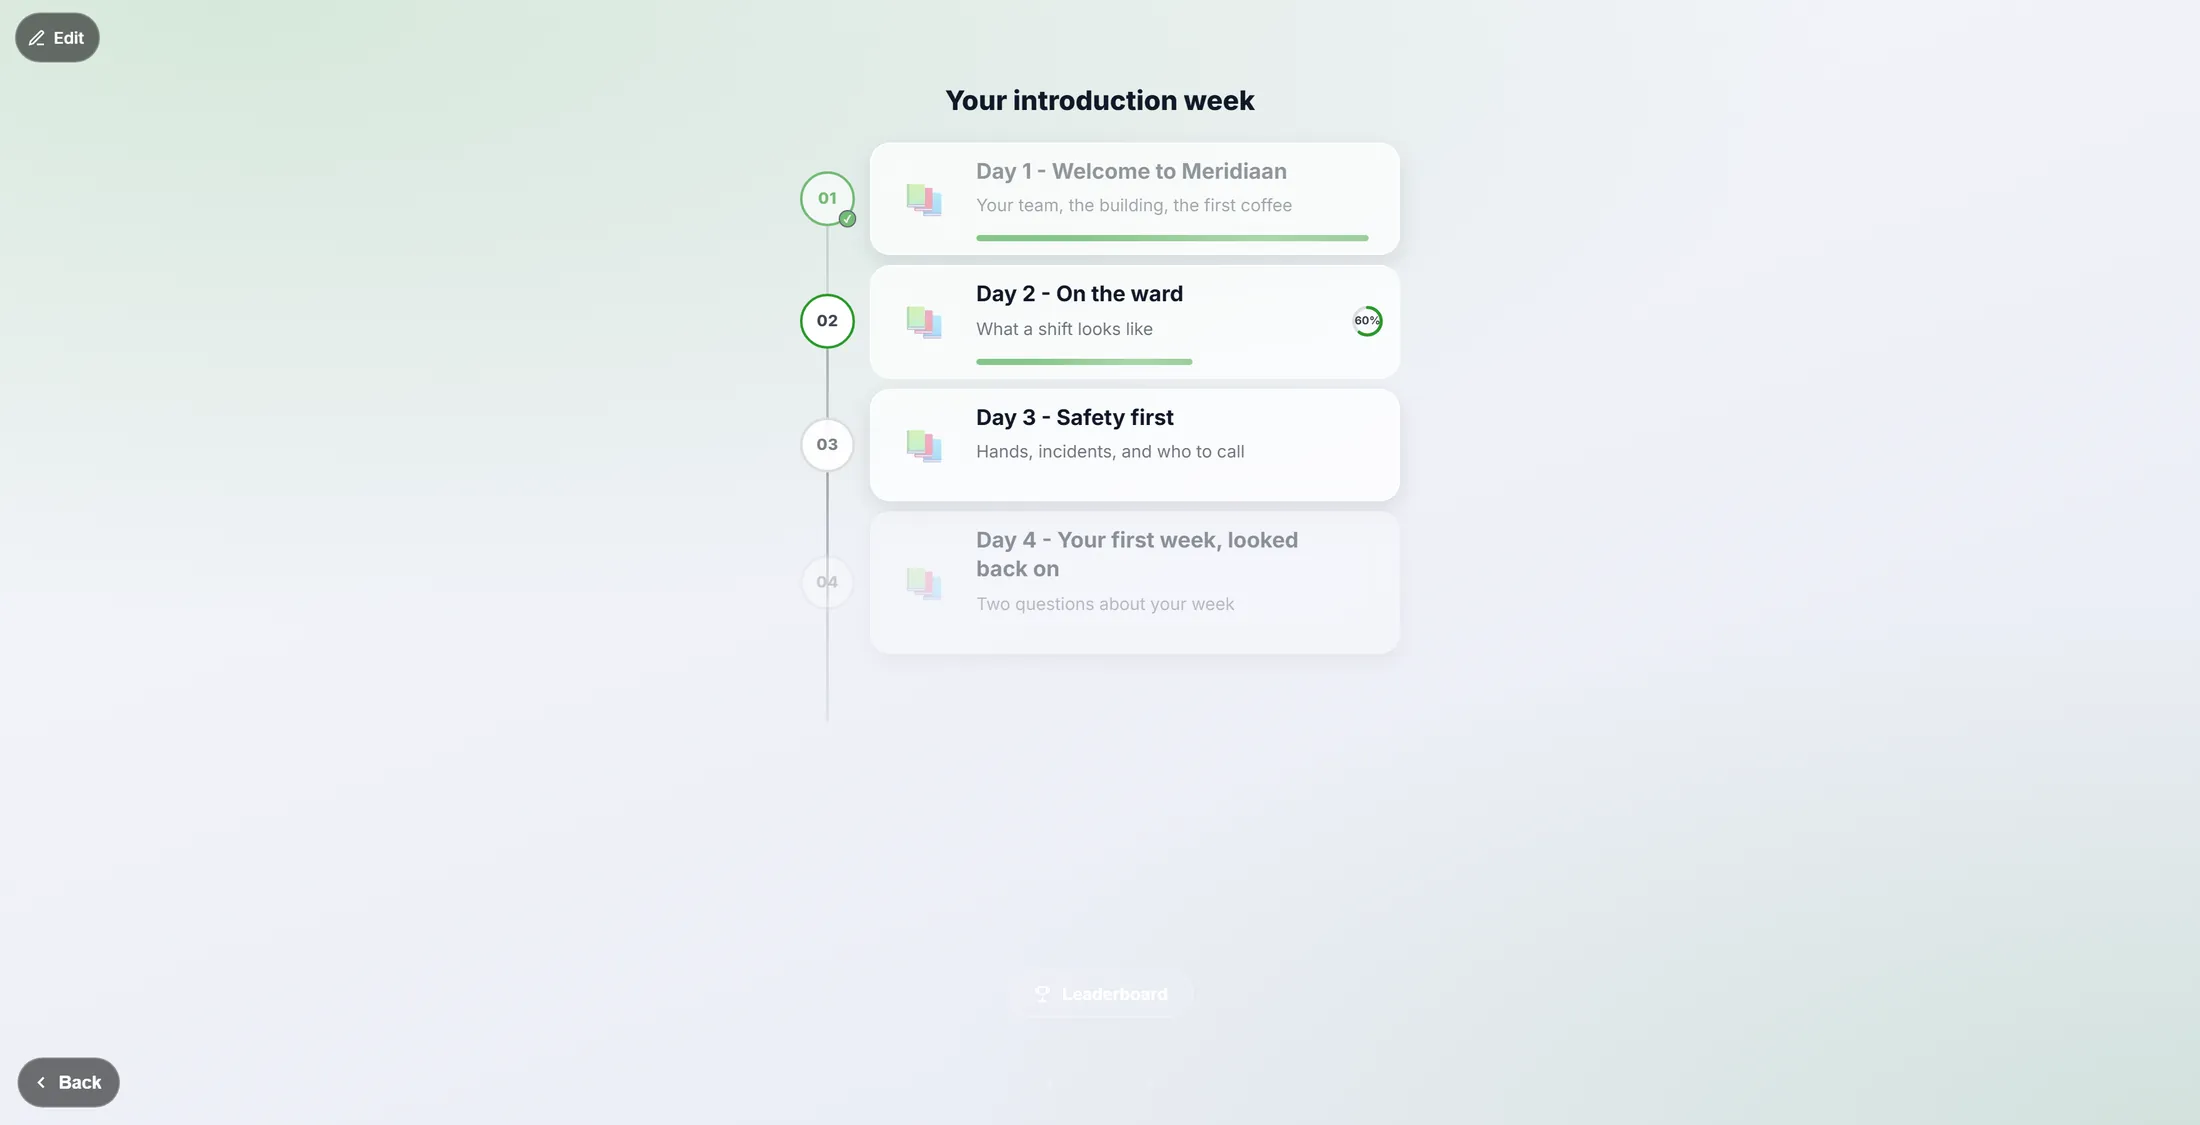
A Navigation slide turns a learning with several groups into chapters a learner can pick from: one card per group, a bar and a ring that show how far each chapter is, a lock on what is not open yet, and a way to the leaderboard.
Competence - a menu inside your learning - 5 min. You need: a learning with more than one group
Nothing is changed until you press Save. Cancel throws your changes away.
What you will be able to do
- Add a menu slide One slide that shows all the parts.
- Choose the cards One card per part, in the order you want.
- Let it make the cards One press makes a card for every part.
- Know what the learner sees Rings, bars and locks show how far they are.
Get this ready first
- A learning No learning yet? Make one first.
- Parts in it A menu needs parts to point at: one group per day or topic.
Do it together, one step at a time
Six steps. Every picture is the real screen, with made-up names.
Open your learning
Find the parts the menu will point at.
- Open your learning in the editor. The column on the left is the FLOW TREE .
- Every block in it is a group: a set of slides that play one after another - Day 1 - Welcome to Meridiaan , Day 2 - On the ward .
- Make a group at the top for the menu itself, for example Start here - choose your day .
- Click the group so it is selected. A new slide is added to the selected group.
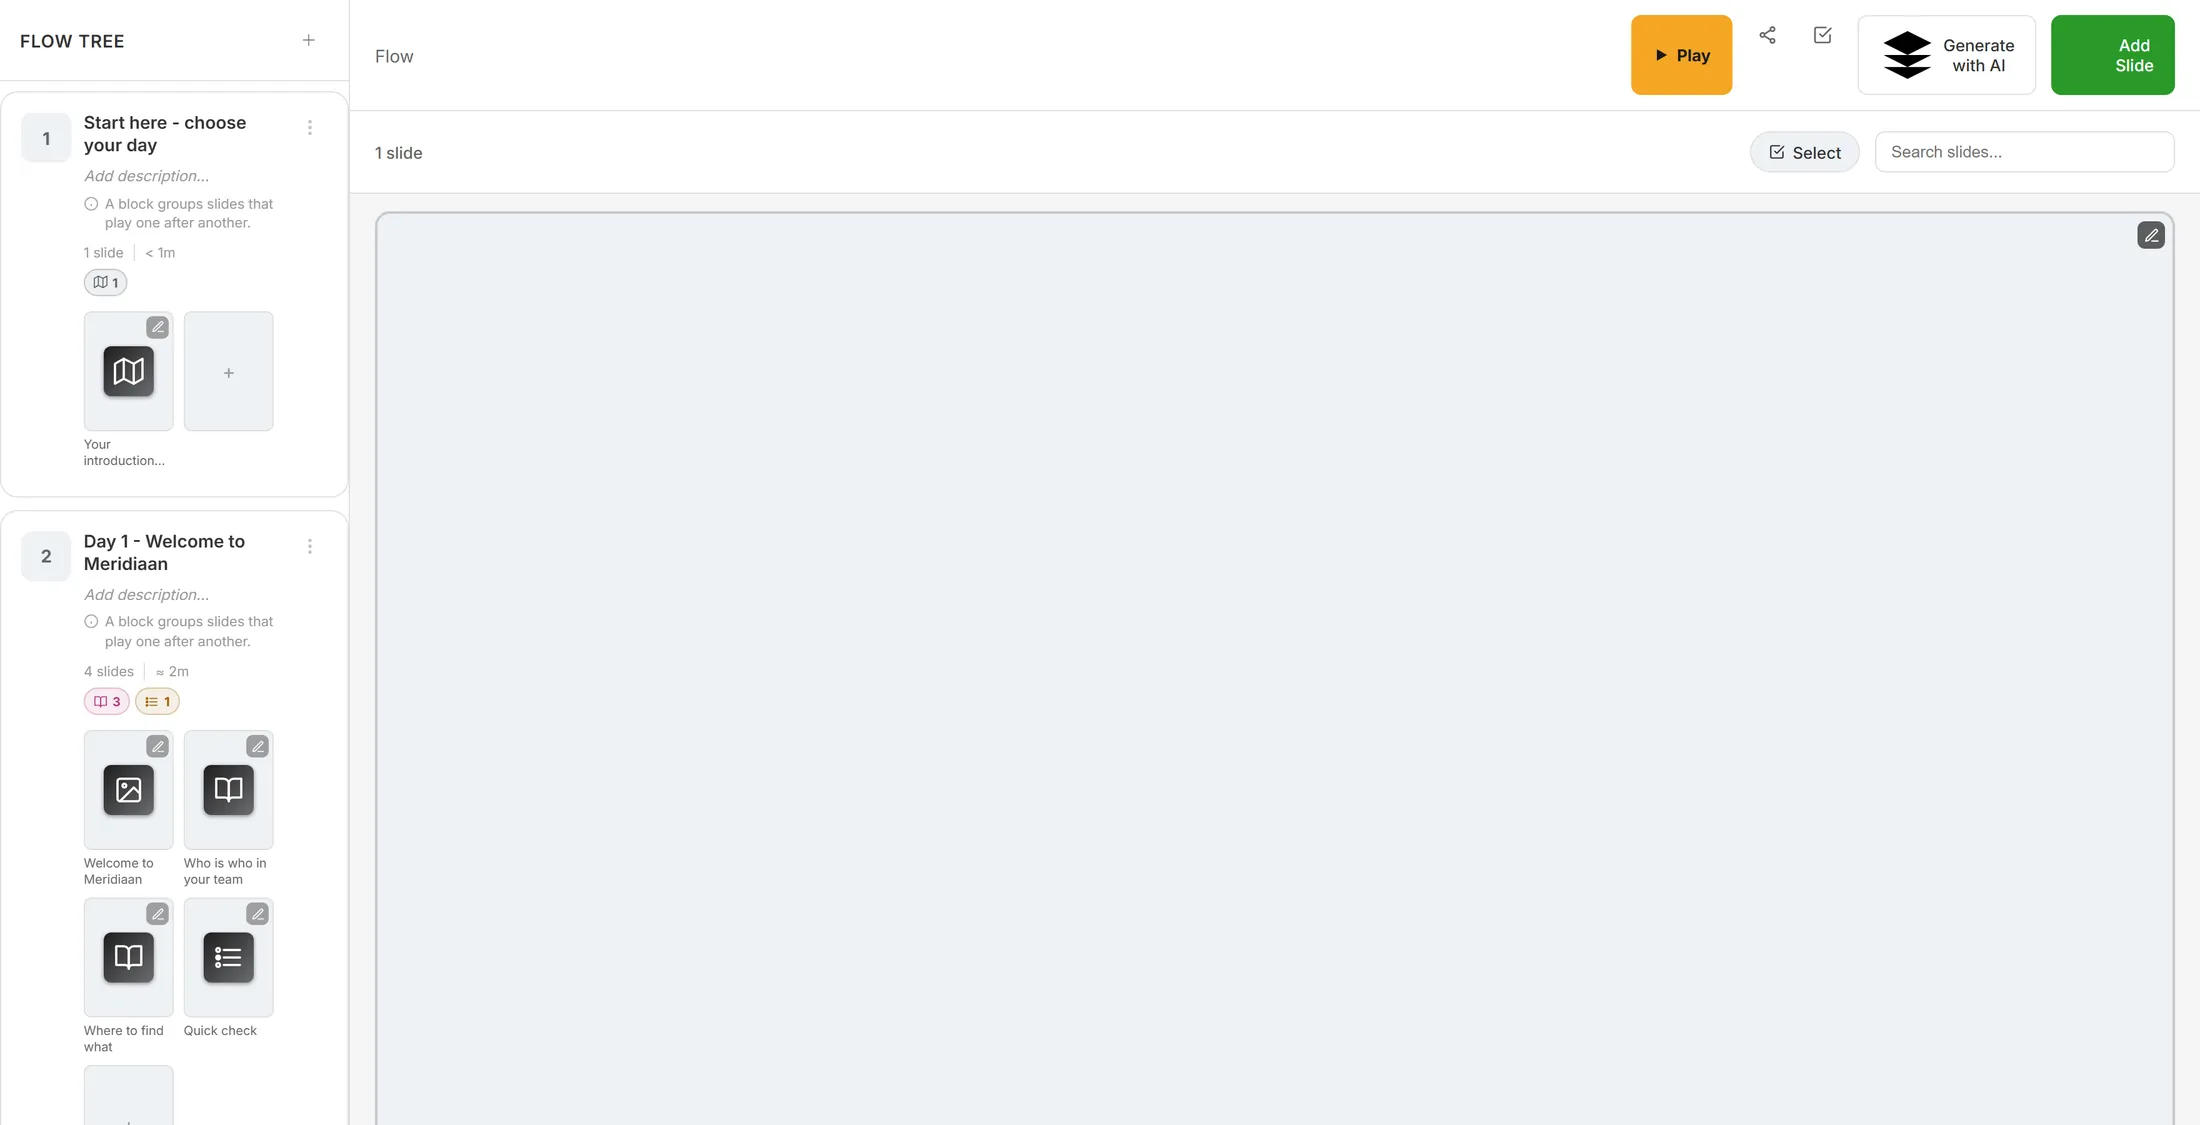
The parts of the learning, on the left. Add a menu slide
Pick the kind of slide that shows a menu.
- Press Add Slide at the top right. The window Select Slide Type opens.
- Type navigation in the search box. Two cards stay.
- Navigation - Menu of other groups . You choose the cards yourself.
- Auto Navigation - Menu built automatically , one card for every group.
- Click Navigation. The slide is added and its panel opens on the right.
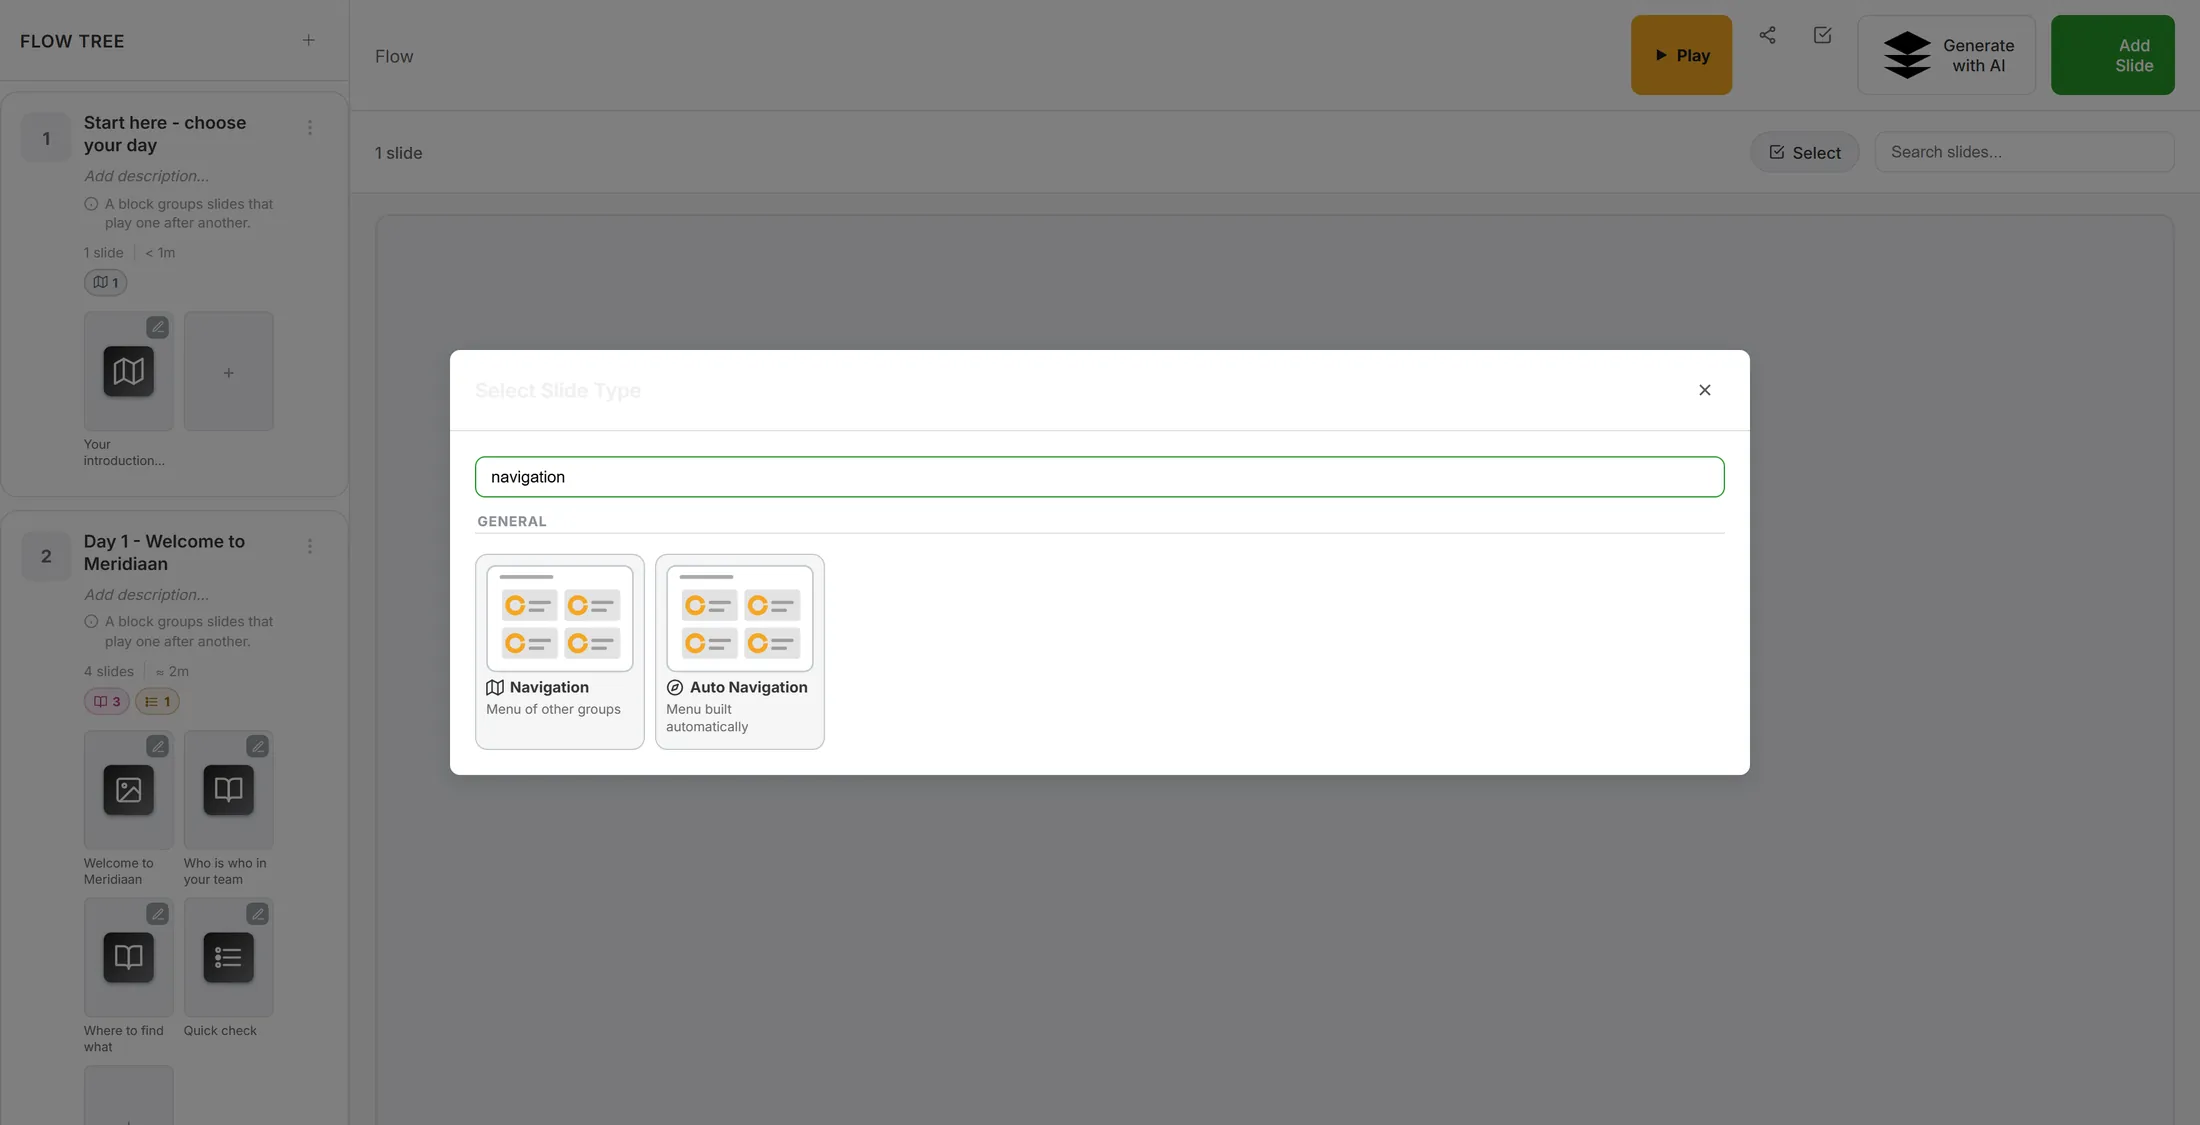
Type "navigation" and two cards are left. Open the menu
The panel on the right has one big button.
- The panel at the right says Navigation at the top.
- TITLE - the words above the menu, for example Your introduction week .
- COVER IMAGE - a picture behind the menu. Not needed.
- Press Edit navigation board. The line under it says what it does: Cards that jump to other groups in this flow.
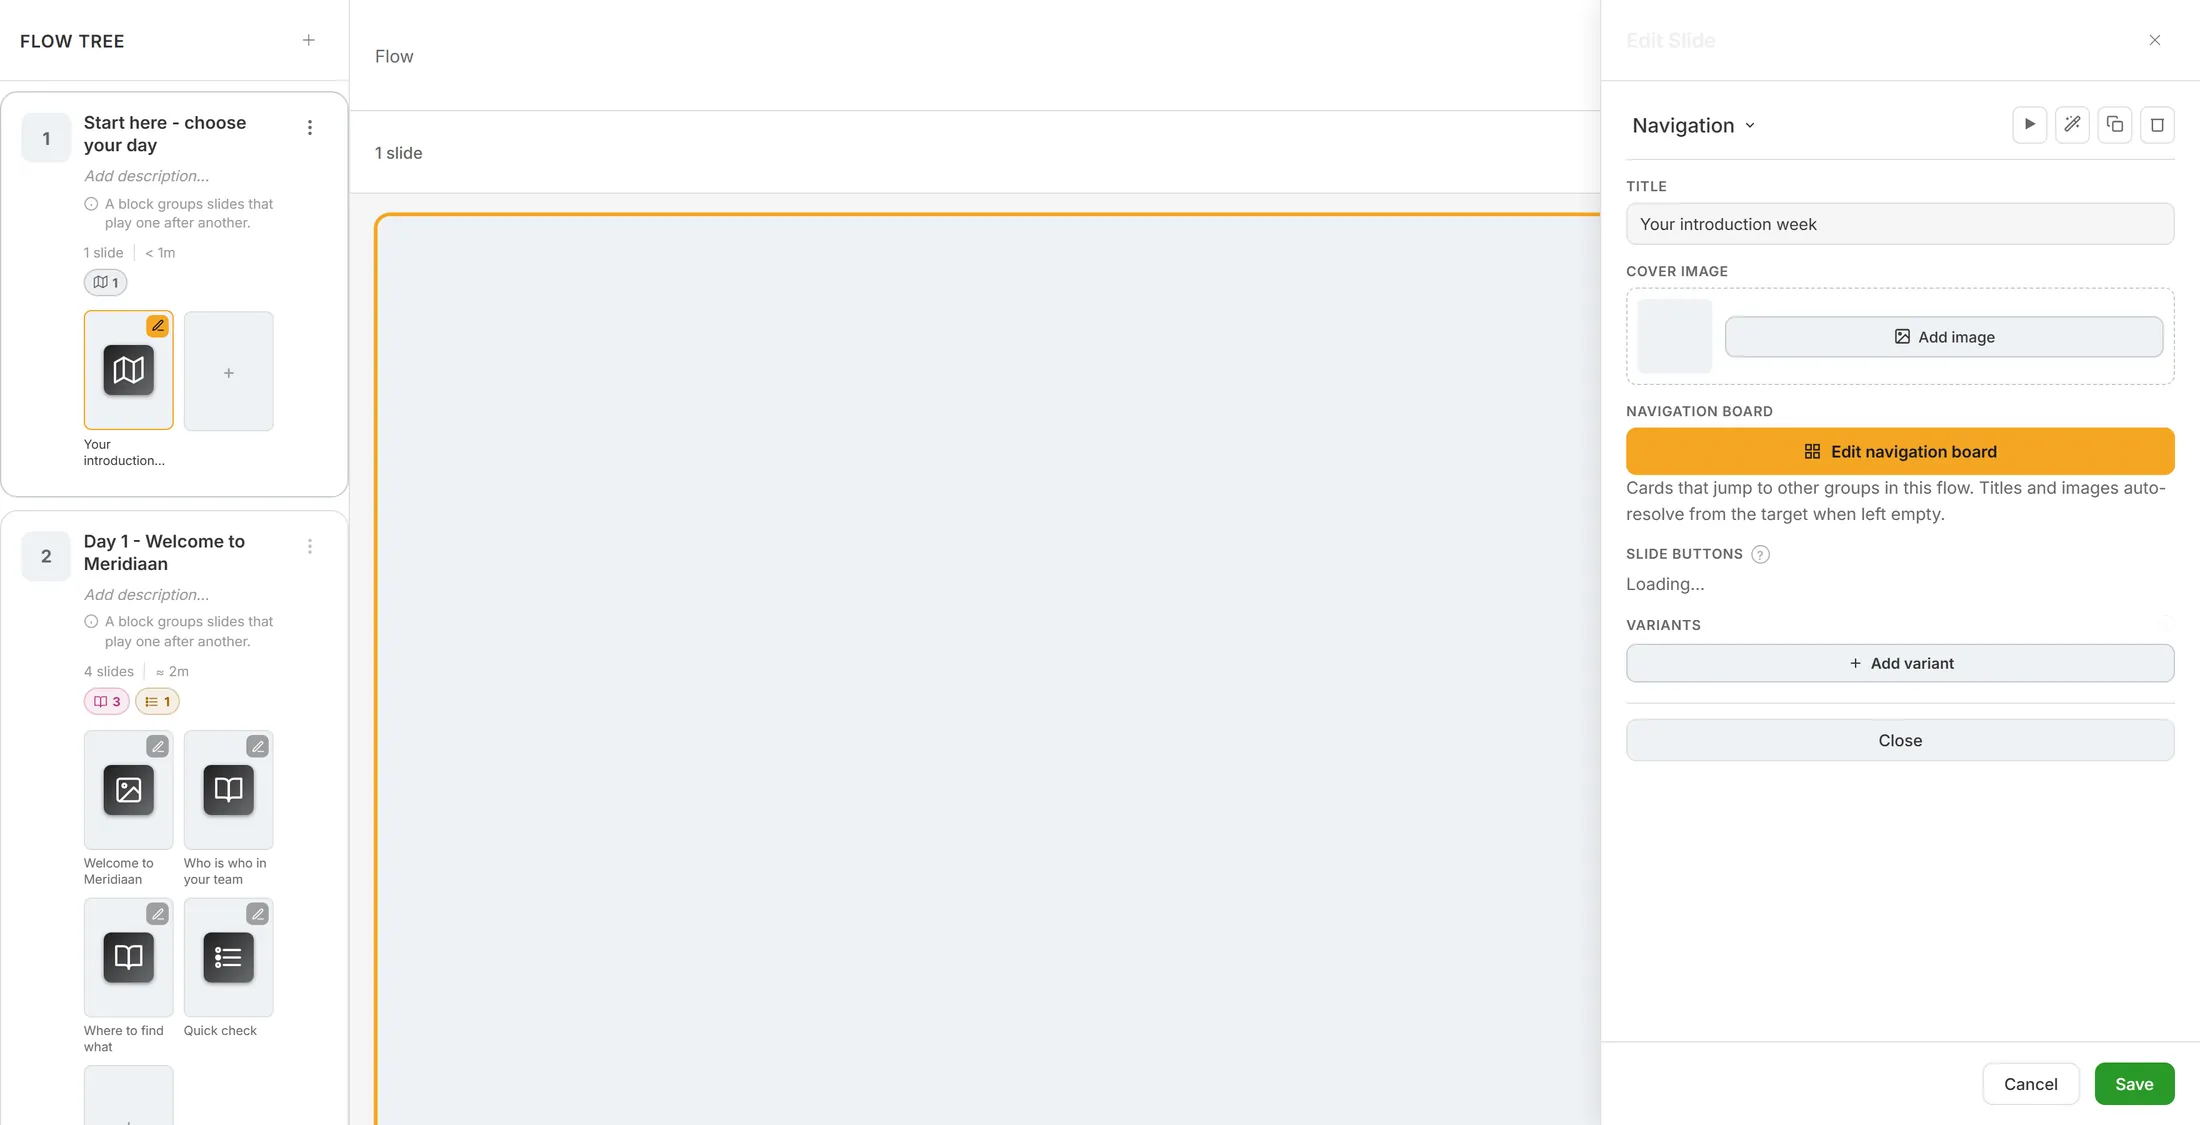
The orange button opens the menu. Choose where each card goes
Each card jumps to one part.
- Every card has a TARGET GROUP : pick the group it opens, for example Day 1 - Welcome to Meridiaan .
- TITLE (OPTIONAL OVERRIDE) - leave it on auto from target and the card uses the group's own name.
- SUBTITLE (OPTIONAL) - one short line under the title: Your team, the building, the first coffee .
- IMAGE URL (OPTIONAL OVERRIDE) - a picture of your own; empty takes the picture of the group.
- The arrows top right of a card move it up or down. The cross removes it.
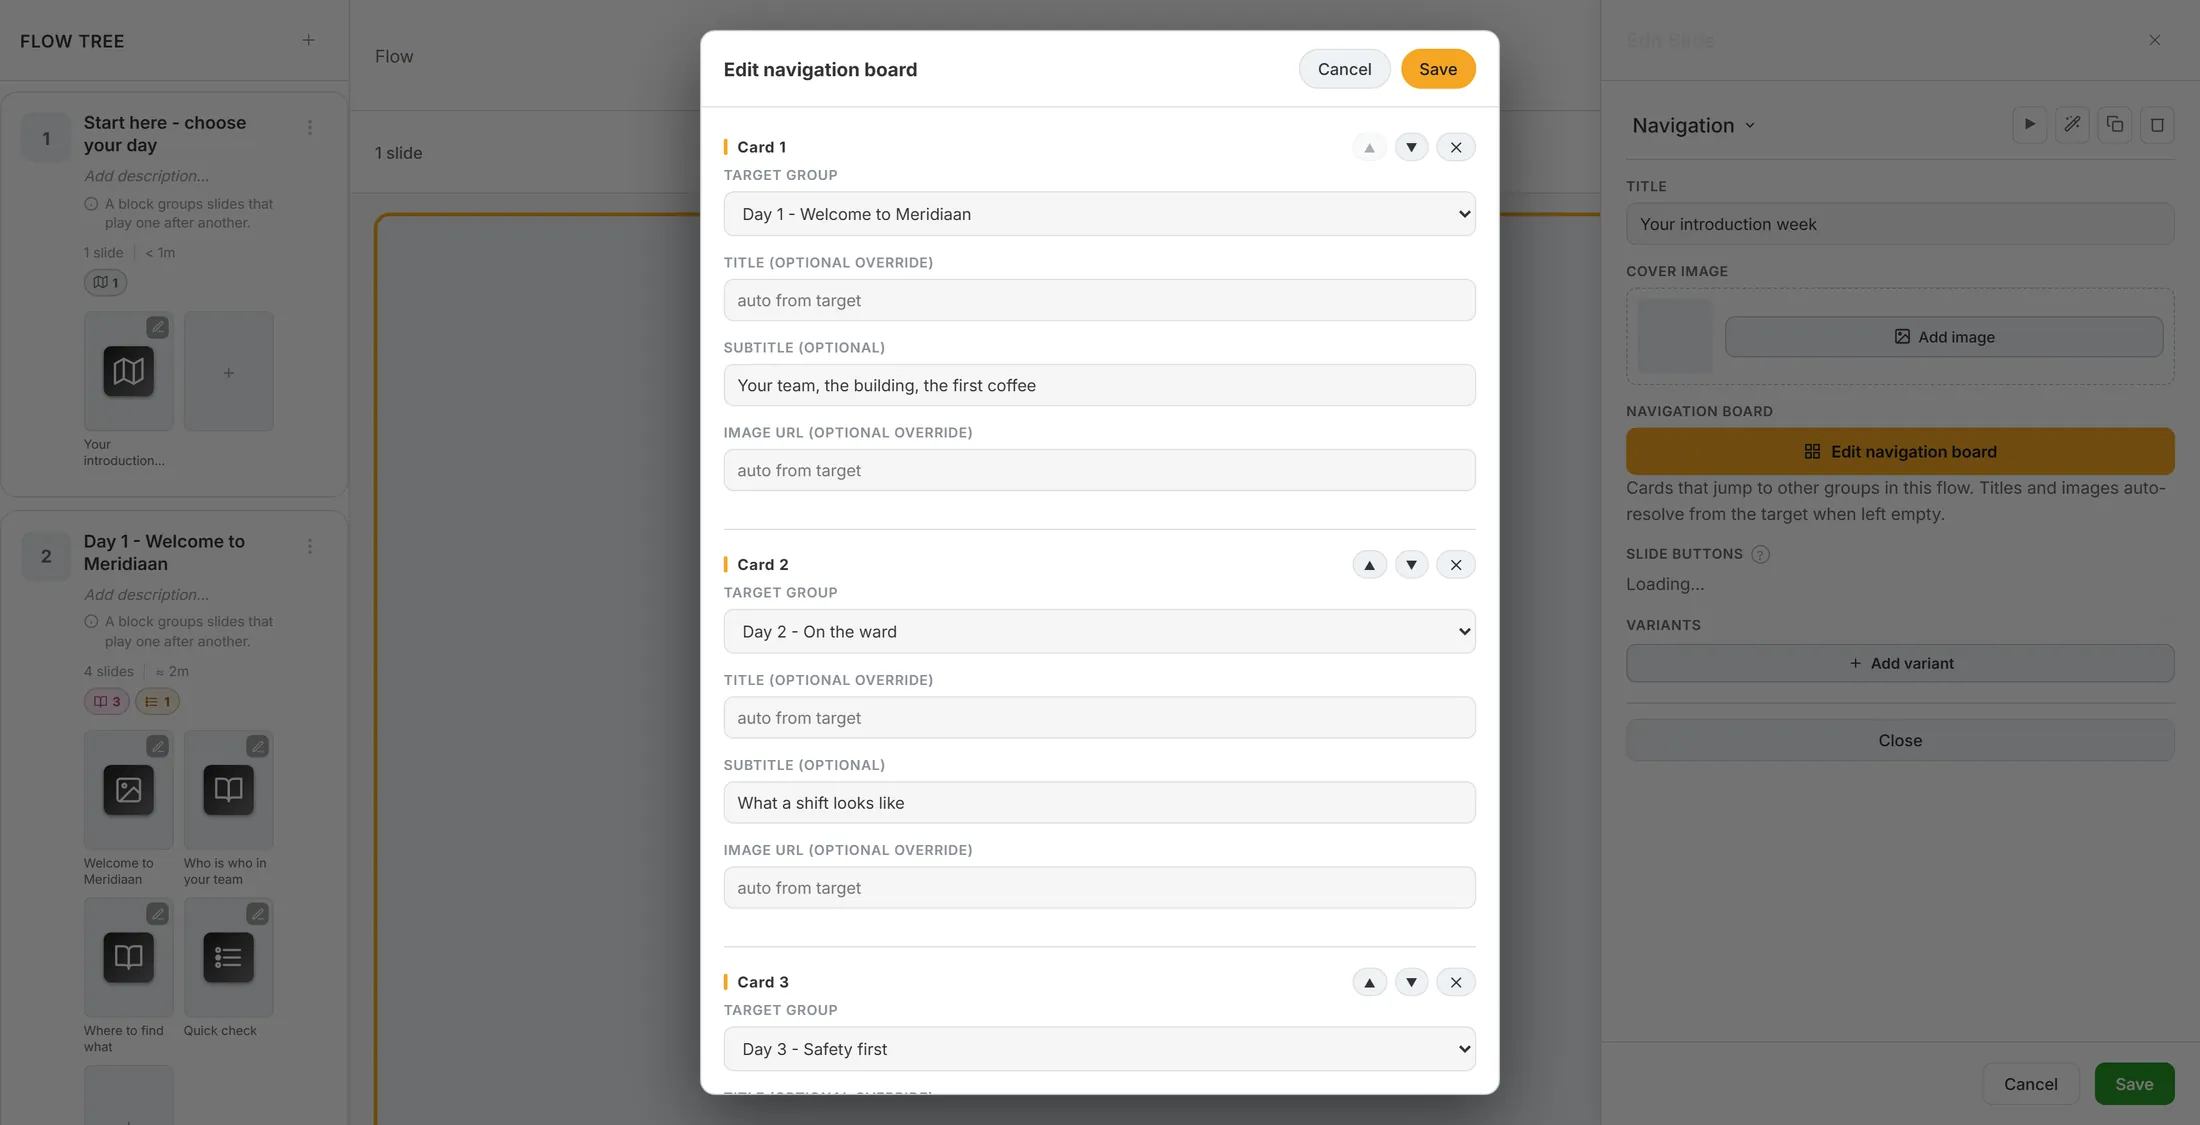
One card per part. Add a card, then save
One more card, or let it make them all.
- Scroll down and press + Add card. An empty card appears at the end.
- Pick its TARGET GROUP - here Scores - and type a title: Who knows the most?
- ⟳ Regenerate from groups makes one card per group, in group order. Titles you typed yourself are kept.
- Press Save at the top. Every card needs a target group; if one has none, the window says Every card needs a target group .
- Cancel closes the window and nothing changes.
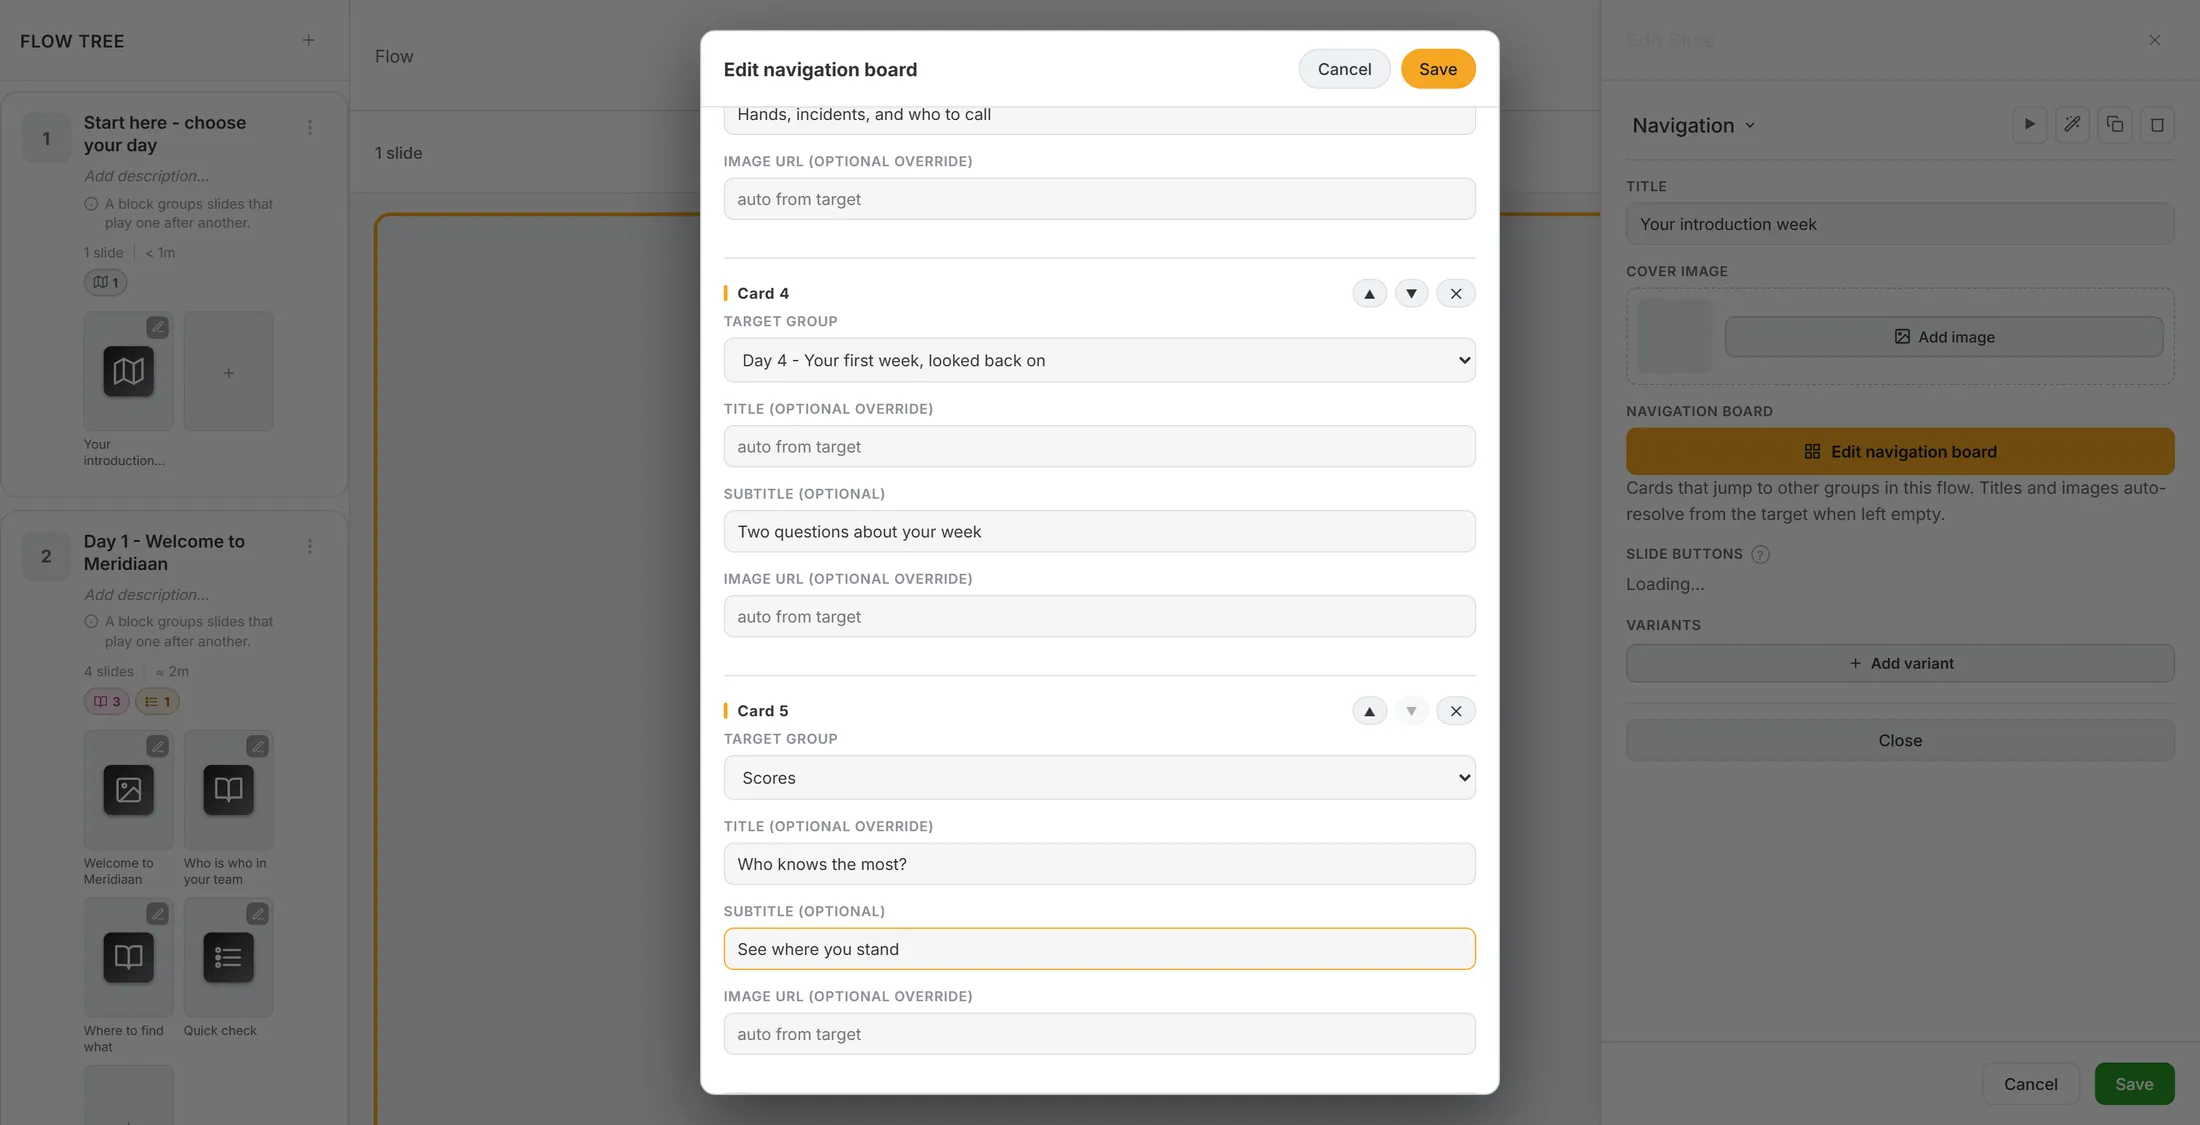
Card 5, added and filled in. What your learner sees
The learner sees the parts, and how far they are.
- Press Play in the editor to see it yourself.
- Every card is a numbered row: 01 , 02 , 03 . The learner taps a row to open that part.
- The bar under a row fills as the learner goes through that part. A finished part gets a tick by its number.
- A part that is half done shows a progress ring with the percentage: 60% .
- A part that is not open yet is pale, with a lock.
- When the learning has a Leaderboard slide, a Leaderboard button sits at the bottom.
Done, half done, not started, locked.
If something is not right
Save does nothing.
One card has no part chosen. Pick one, or remove that card with the cross.
A card shows the wrong name.
Type your own words in TITLE. Empty means it uses the name of the part.
I added a new part. Is it on the menu?
Not by itself. Press Regenerate from groups, or add a card.
The menu group is not in the list.
That is on purpose. A card to the menu itself would go round in a circle.
The words on this page
- group
- A part of the learning: slides that play one after another.
- navigation board
- The list of cards on a menu slide.
- progress ring
- A small circle that fills up, with a percent inside.
What to do next
- Make a learning first No learning yet? Start here.
- Add a game A quick game, and a list of who knows the most.
- All explainers The other things you can learn here.