Make a Control Room by describing it
Paste a briefing - the goal, the questions, the measures, where the numbers come from, who does what. CoVince (or a CrewMate of your choice) writes a proposal, you adjust it step by step, and only then it builds the board, its measures and its tiles.
Coordination - see everything on one wall - 6 min. You need: to be an admin of your organisation
Reading this changes nothing. CoVince only builds when you press Build the board - until then it is a proposal you can change or throw away.
What you will be able to do
- Describe it Say what the board is for, in normal words.
- Check the plan Untick, rename, set a target, pick a source.
- Say where numbers come from Connect one, use one that exists, or type by hand for now.
- Get the board One press and the board stands, with owners on every measure.
Get this ready first
- A few sentences Think of: what is the board for, which numbers matter, who owns them.
- The right to make it Only an admin sees Make with AI. Others can look at the board, not make it.
Do it together, one step at a time
Eleven short steps. The real board in the pictures was made from the briefing in step 3.
Press Edit, then Make with AI
Open the Control Room and press the pencil. The button Make with AI appears.
- Open the Control Room. If it asks which organisation and which journey , pick them - the board will be about that journey.
- Press the pencil at the top right: Edit.
- The header now shows more buttons. Press Make with AI.
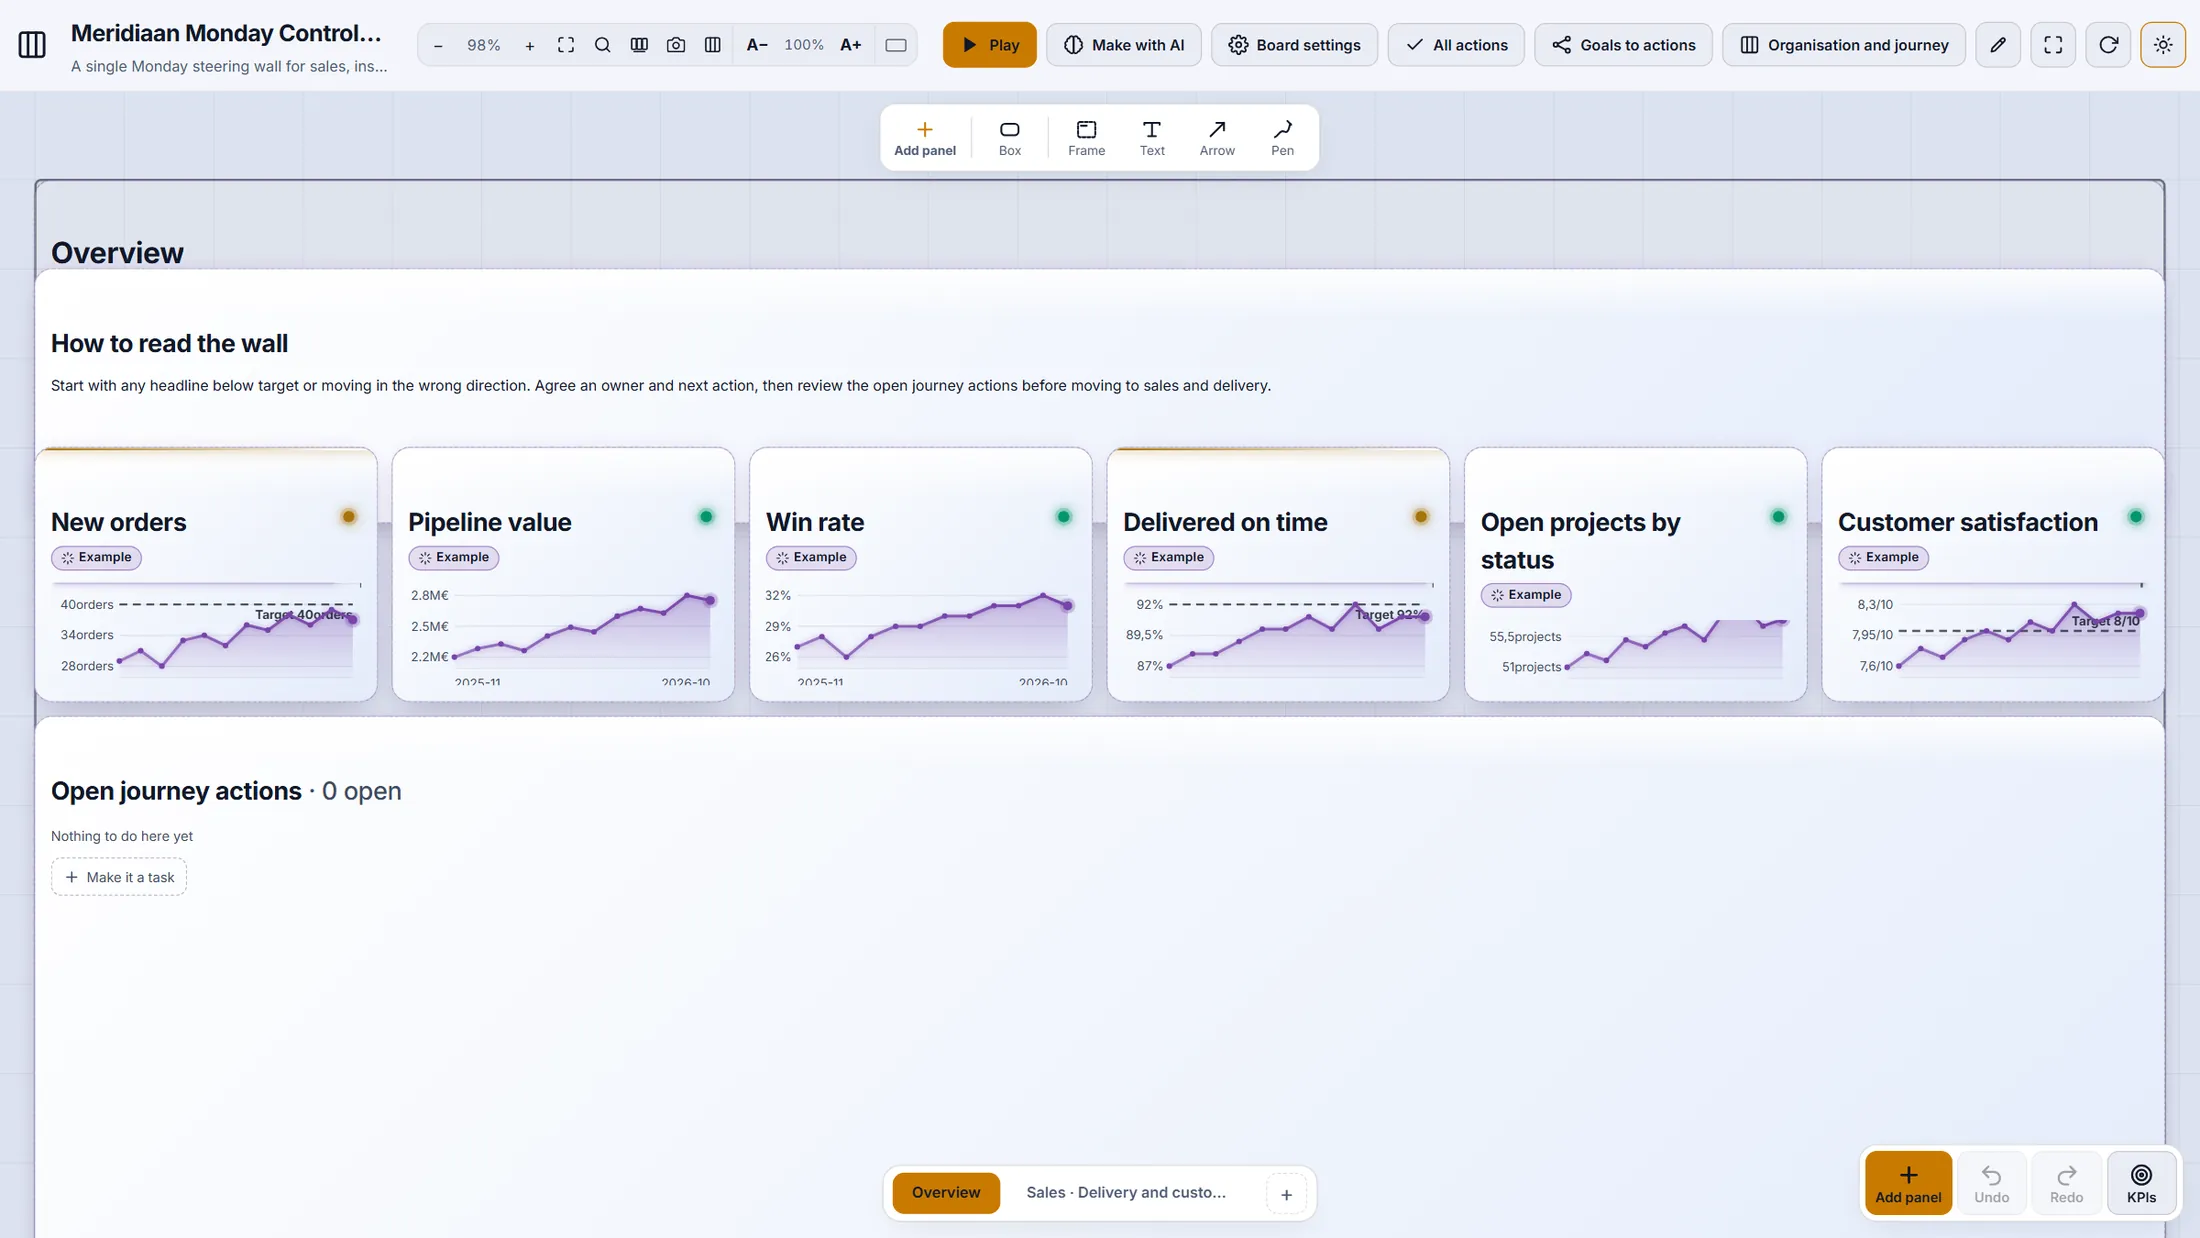
Edit mode: the header grows, and Make with AI is one of the new buttons. A window with six steps
A window opens. At the top you see where you are: step 1 of 6.
- Look at the row of steps: Briefing, Proposal, Sources, People, CrewMate, Build . You are on the first.
- Under it is a big empty box: Paste the briefing .
- Rather start from an existing board? Press Start from a template instead.
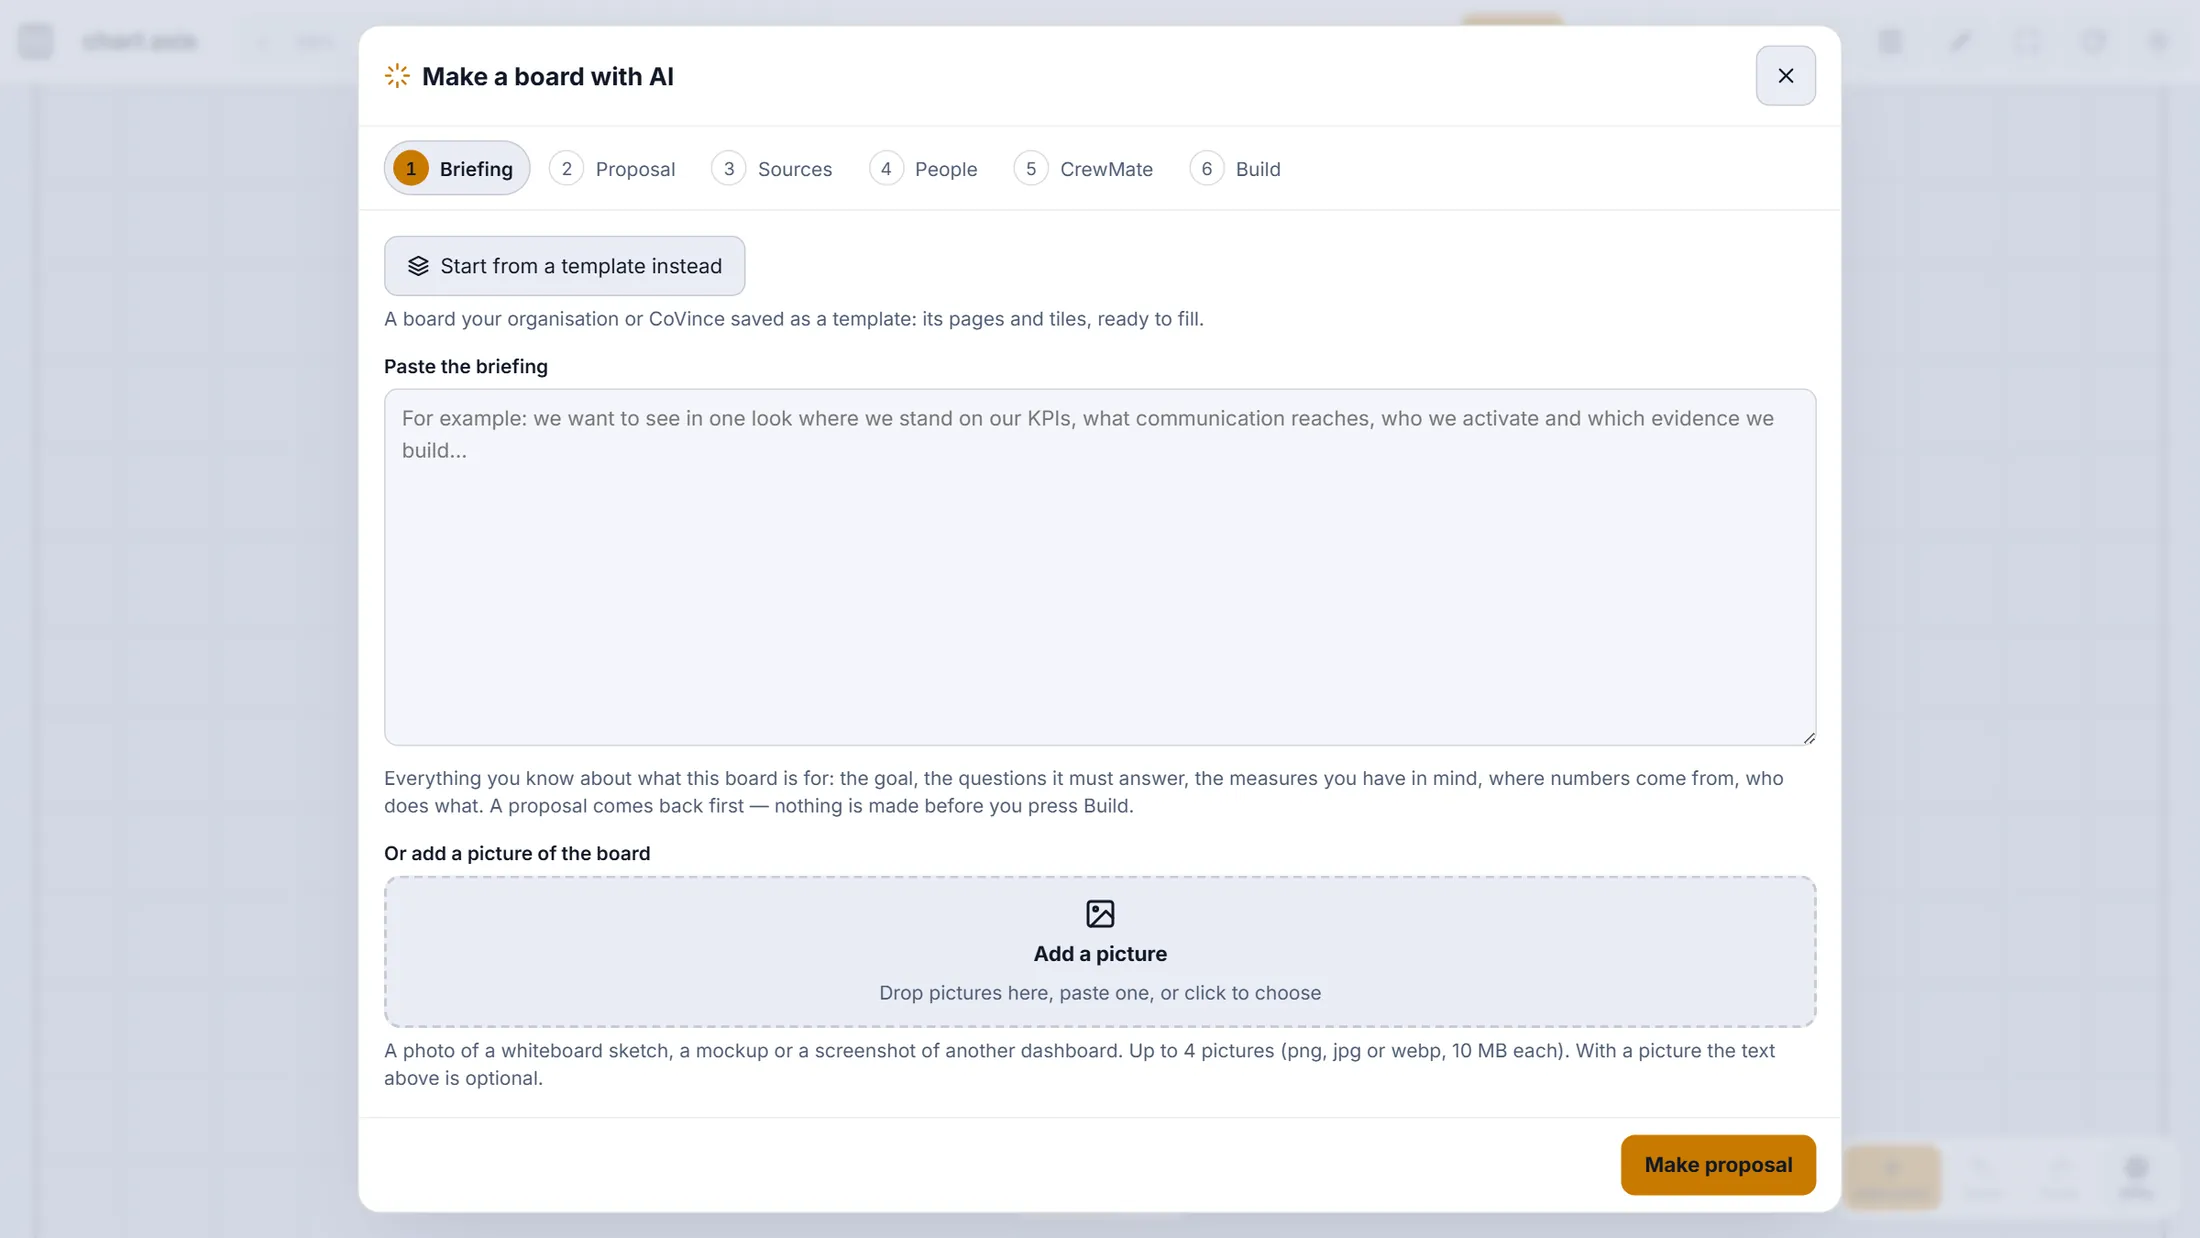
Step 1 of 6: the briefing box, the picture drop zone and the template button. Say what you want to see
Type it like you would tell a colleague. Four or five sentences are enough.
- Click in the box and type or paste your briefing. In the picture: Meridiaan B.V. sells installation work and wants one wall for the Monday meeting.
- Name the measures with a target (new orders: 40 a month; delivered on time: 92%).
- Say where numbers come from (typed by hand, the evaluation survey, Google Analytics) and who owns each.
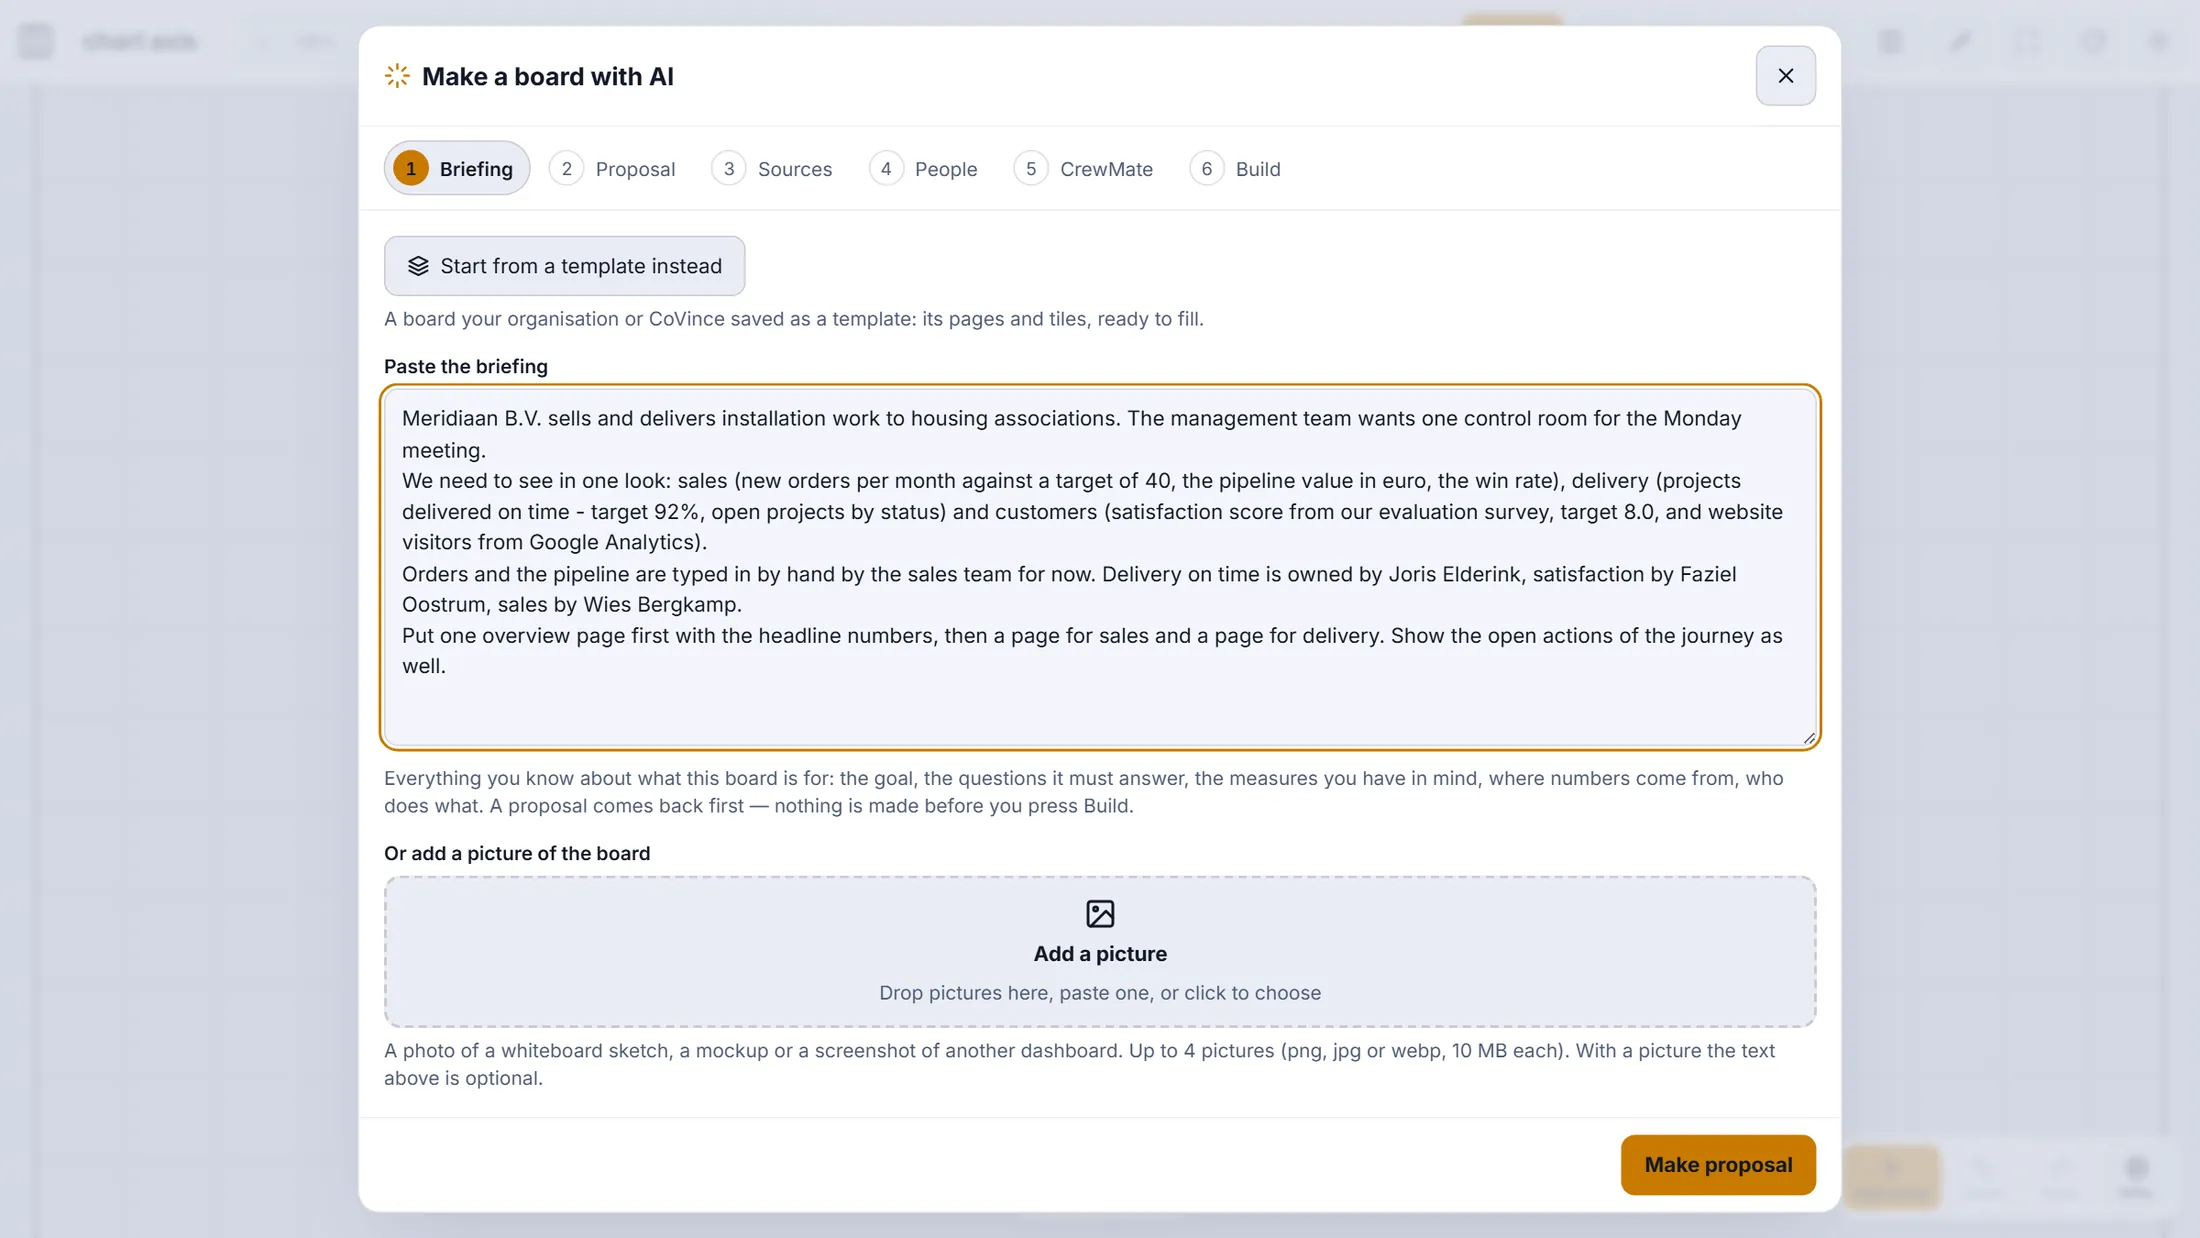
A real briefing: plain sentences, targets, sources and owners. Pick the screens, press Make proposal
Under the box you pick the screen size. Then press the button and wait about a minute.
- Scroll down a little. At Which screens is this board for? keep One screen (16:9) , or choose 2 or 3 screens side by side, or a portrait wall.
- At Make with keep CoVince (general) , or pick a CrewMate that knows your work.
- Press Make proposal. The button dims and the window says Reading the briefing and drafting a proposal . In this run it took about a minute.
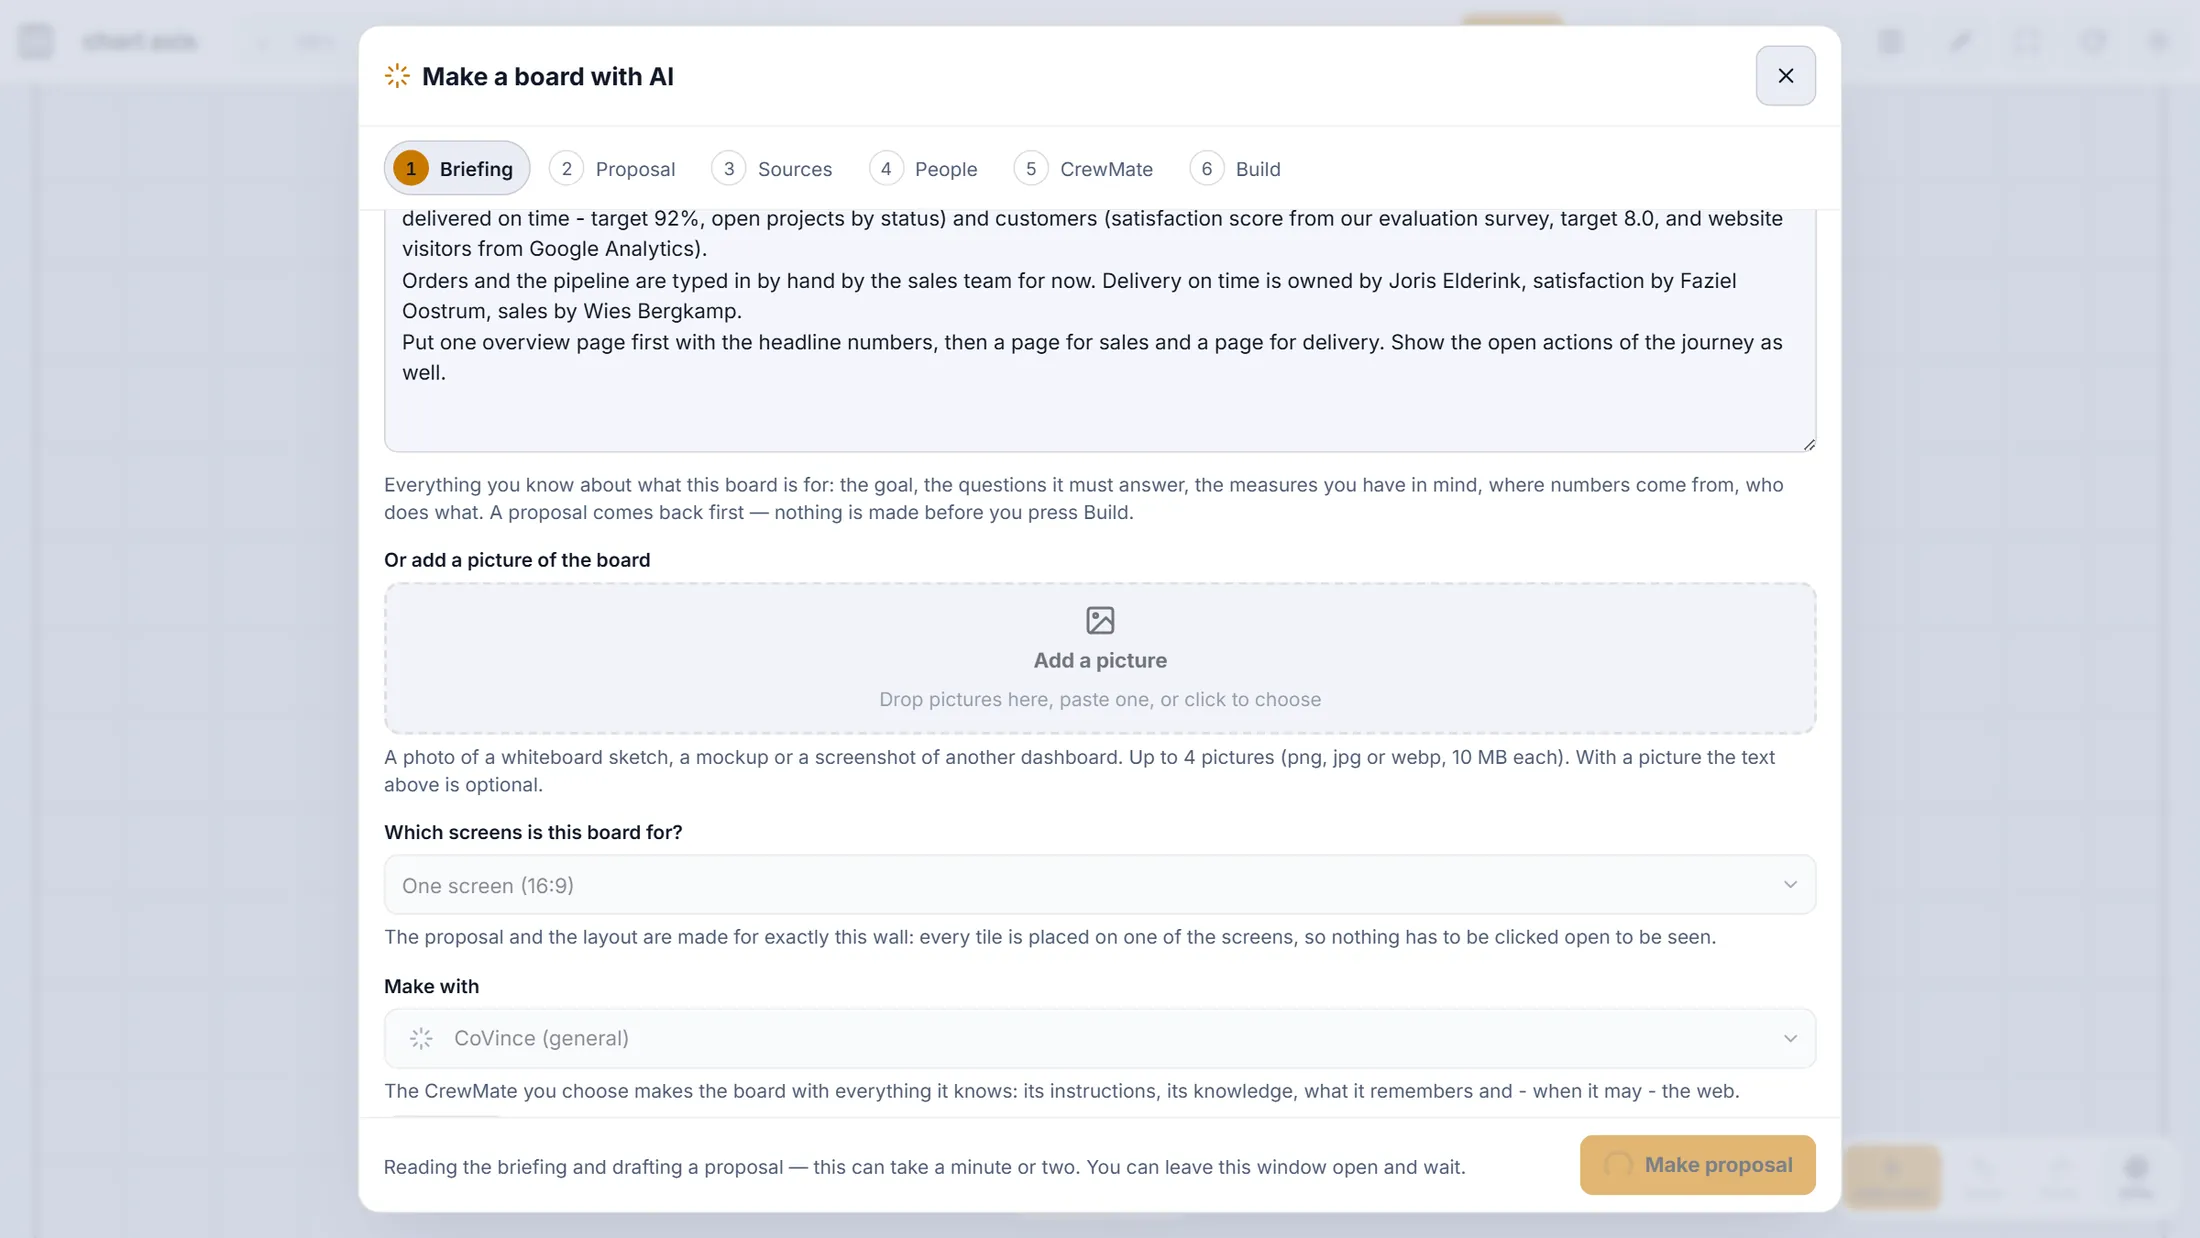
While the proposal is drafted, the button is dimmed and the message says what is happening. Read the plan
A plan appears: a name for the board, some advice, and how it is laid out.
- Read Name of the board . Change it if you like - here: Meridiaan Monday Control Room.
- Read the Advice : how to use the wall in the meeting, what to automate, what is still to decide.
- Under Groups on the wall every group gets its own screens, left to right. Rename or remove a group here.
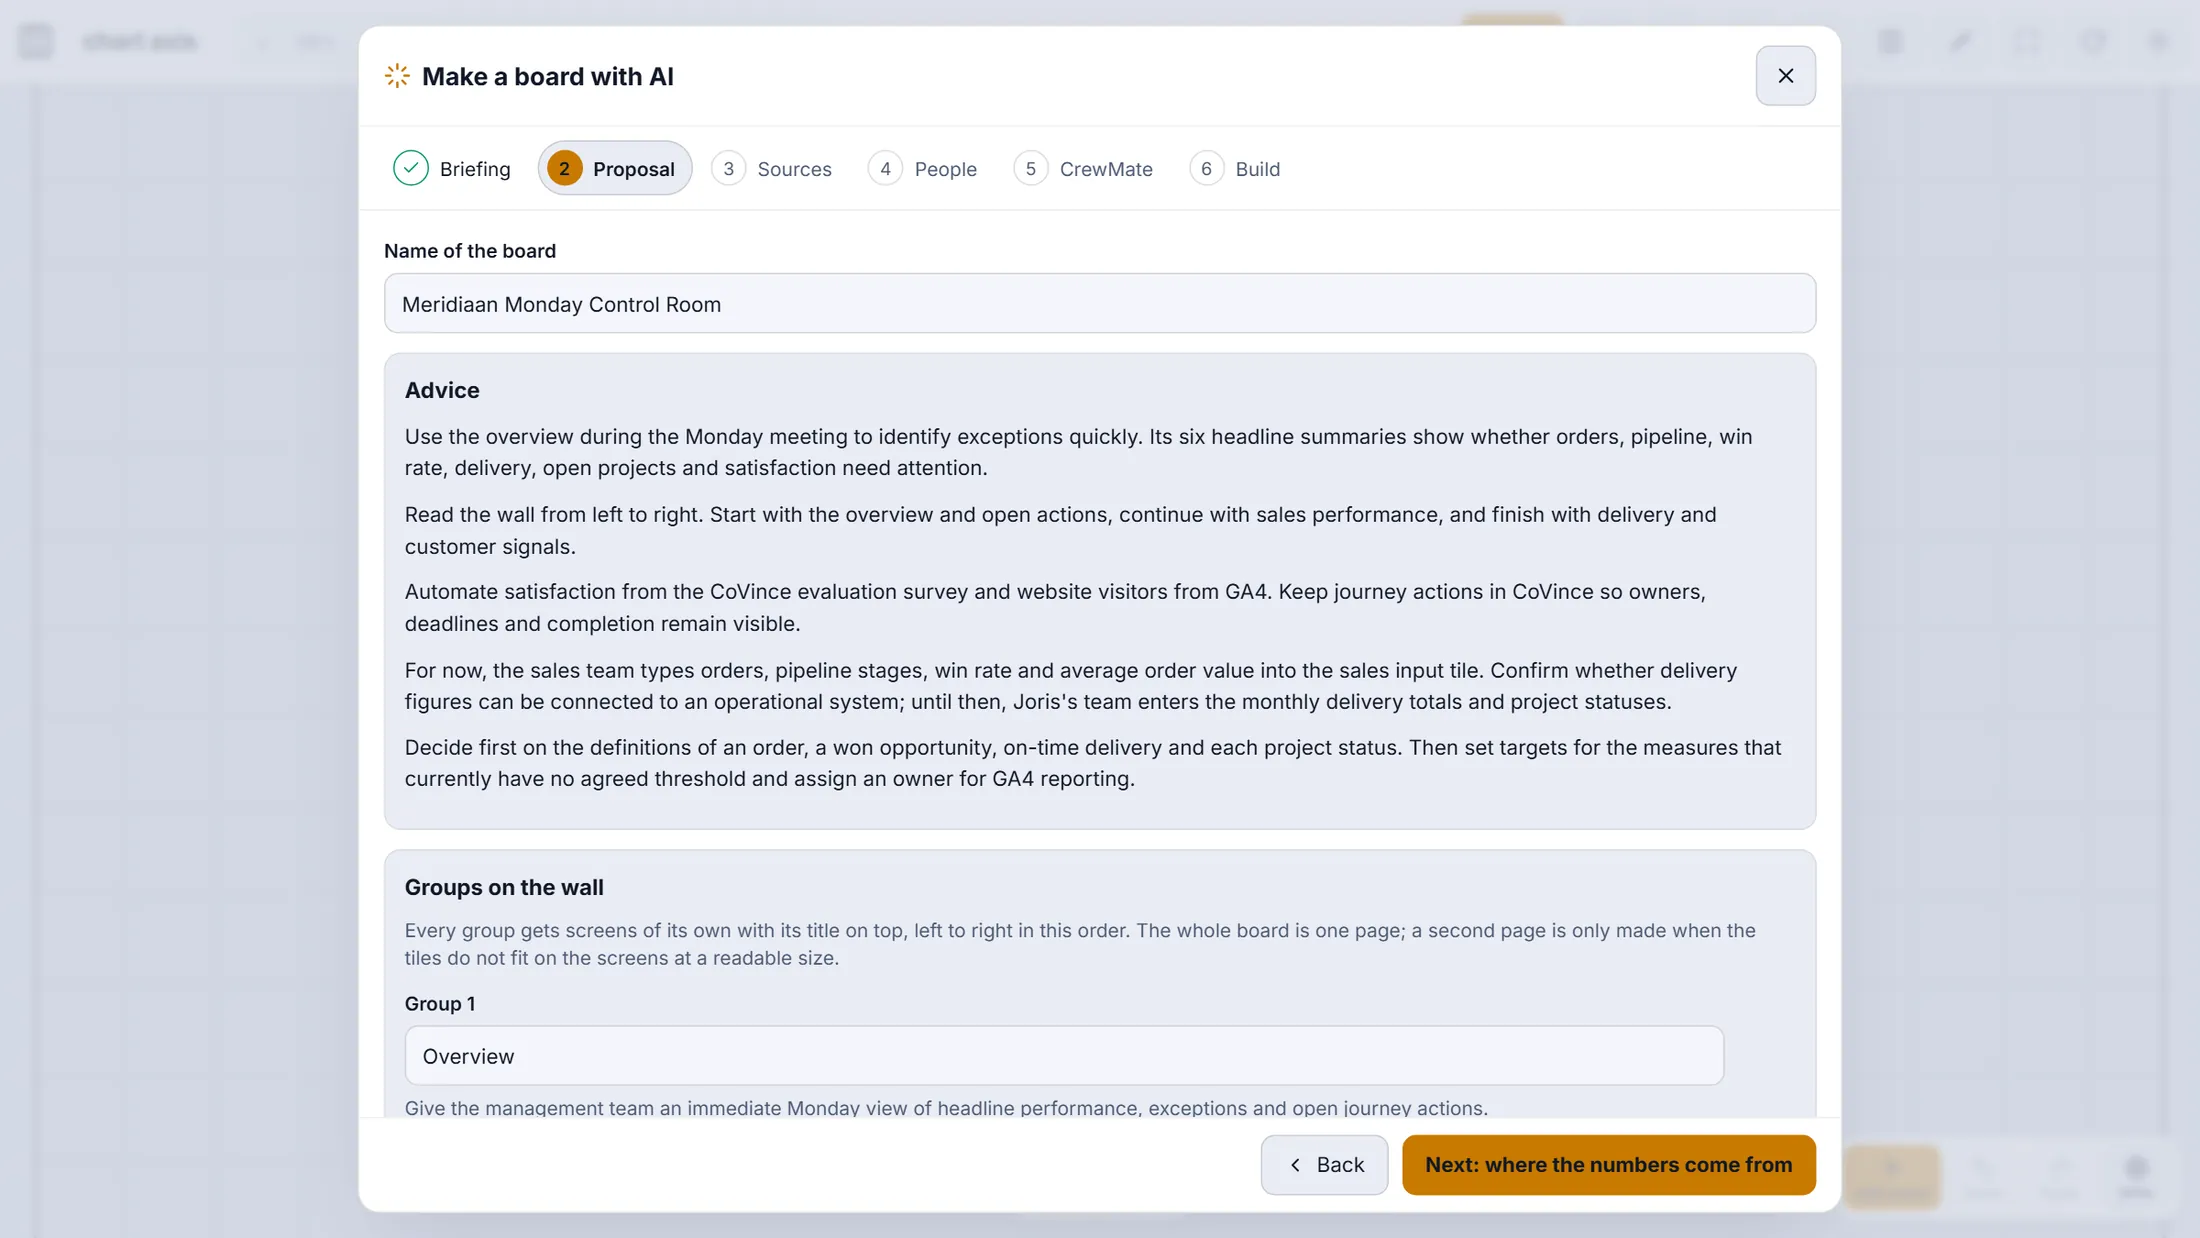
The proposal CoVince wrote from the briefing: name, advice, groups. Untick, rename, set targets
Scroll down to Measures. Every number on your wall is a card you can change.
- Untick the box at the left of a measure you do not want. It is then not made.
- Change the name, the Target (for example 40), and how the tile looks under Tile : Gauge, Trend, List, Number...
- Keep On the overview ticked for the numbers that must sit on the first page.
- Press Next: where the numbers come from.
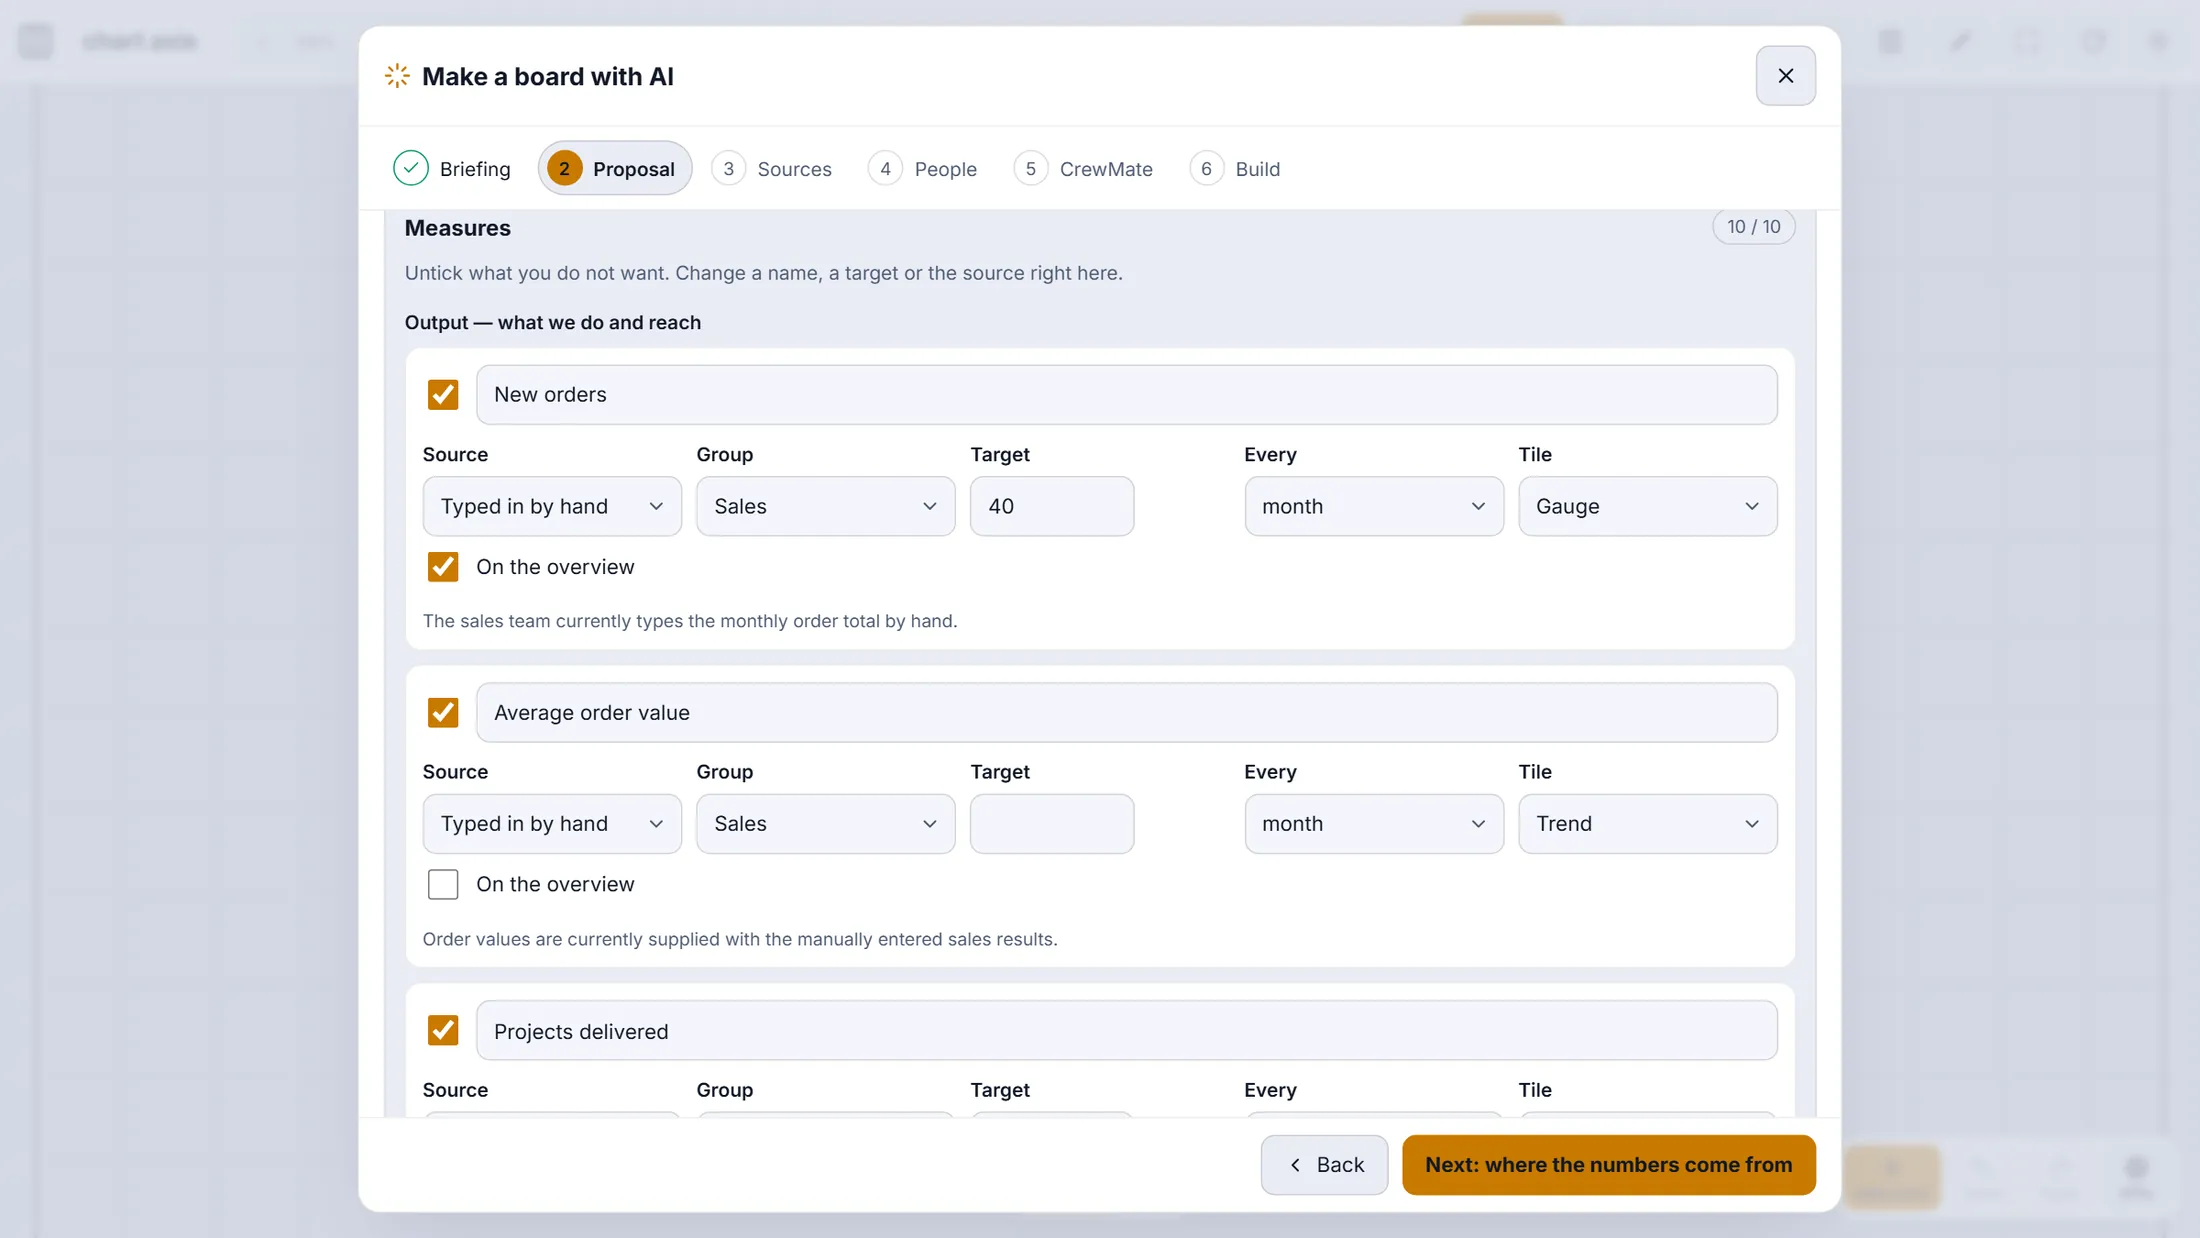
Each measure is a card. 10 / 10 means all ten are kept. Say where the numbers come from
You get one card per source. A source that cannot be connected yet can be typed in by hand for now.
- Read each card. The label at its top right says Ready or Still needed , with what is missing.
- Pick how to feed it: Connect it, Use a source that is already there or Type the numbers in by hand for now.
- Google Analytics: press Connect Google Analytics, sign in in the window that opens, come back and press I connected — check again, then fill in the Property id .
- No survey yet? It tells you to make the evaluation form as a survey first - or type the scores in by hand.
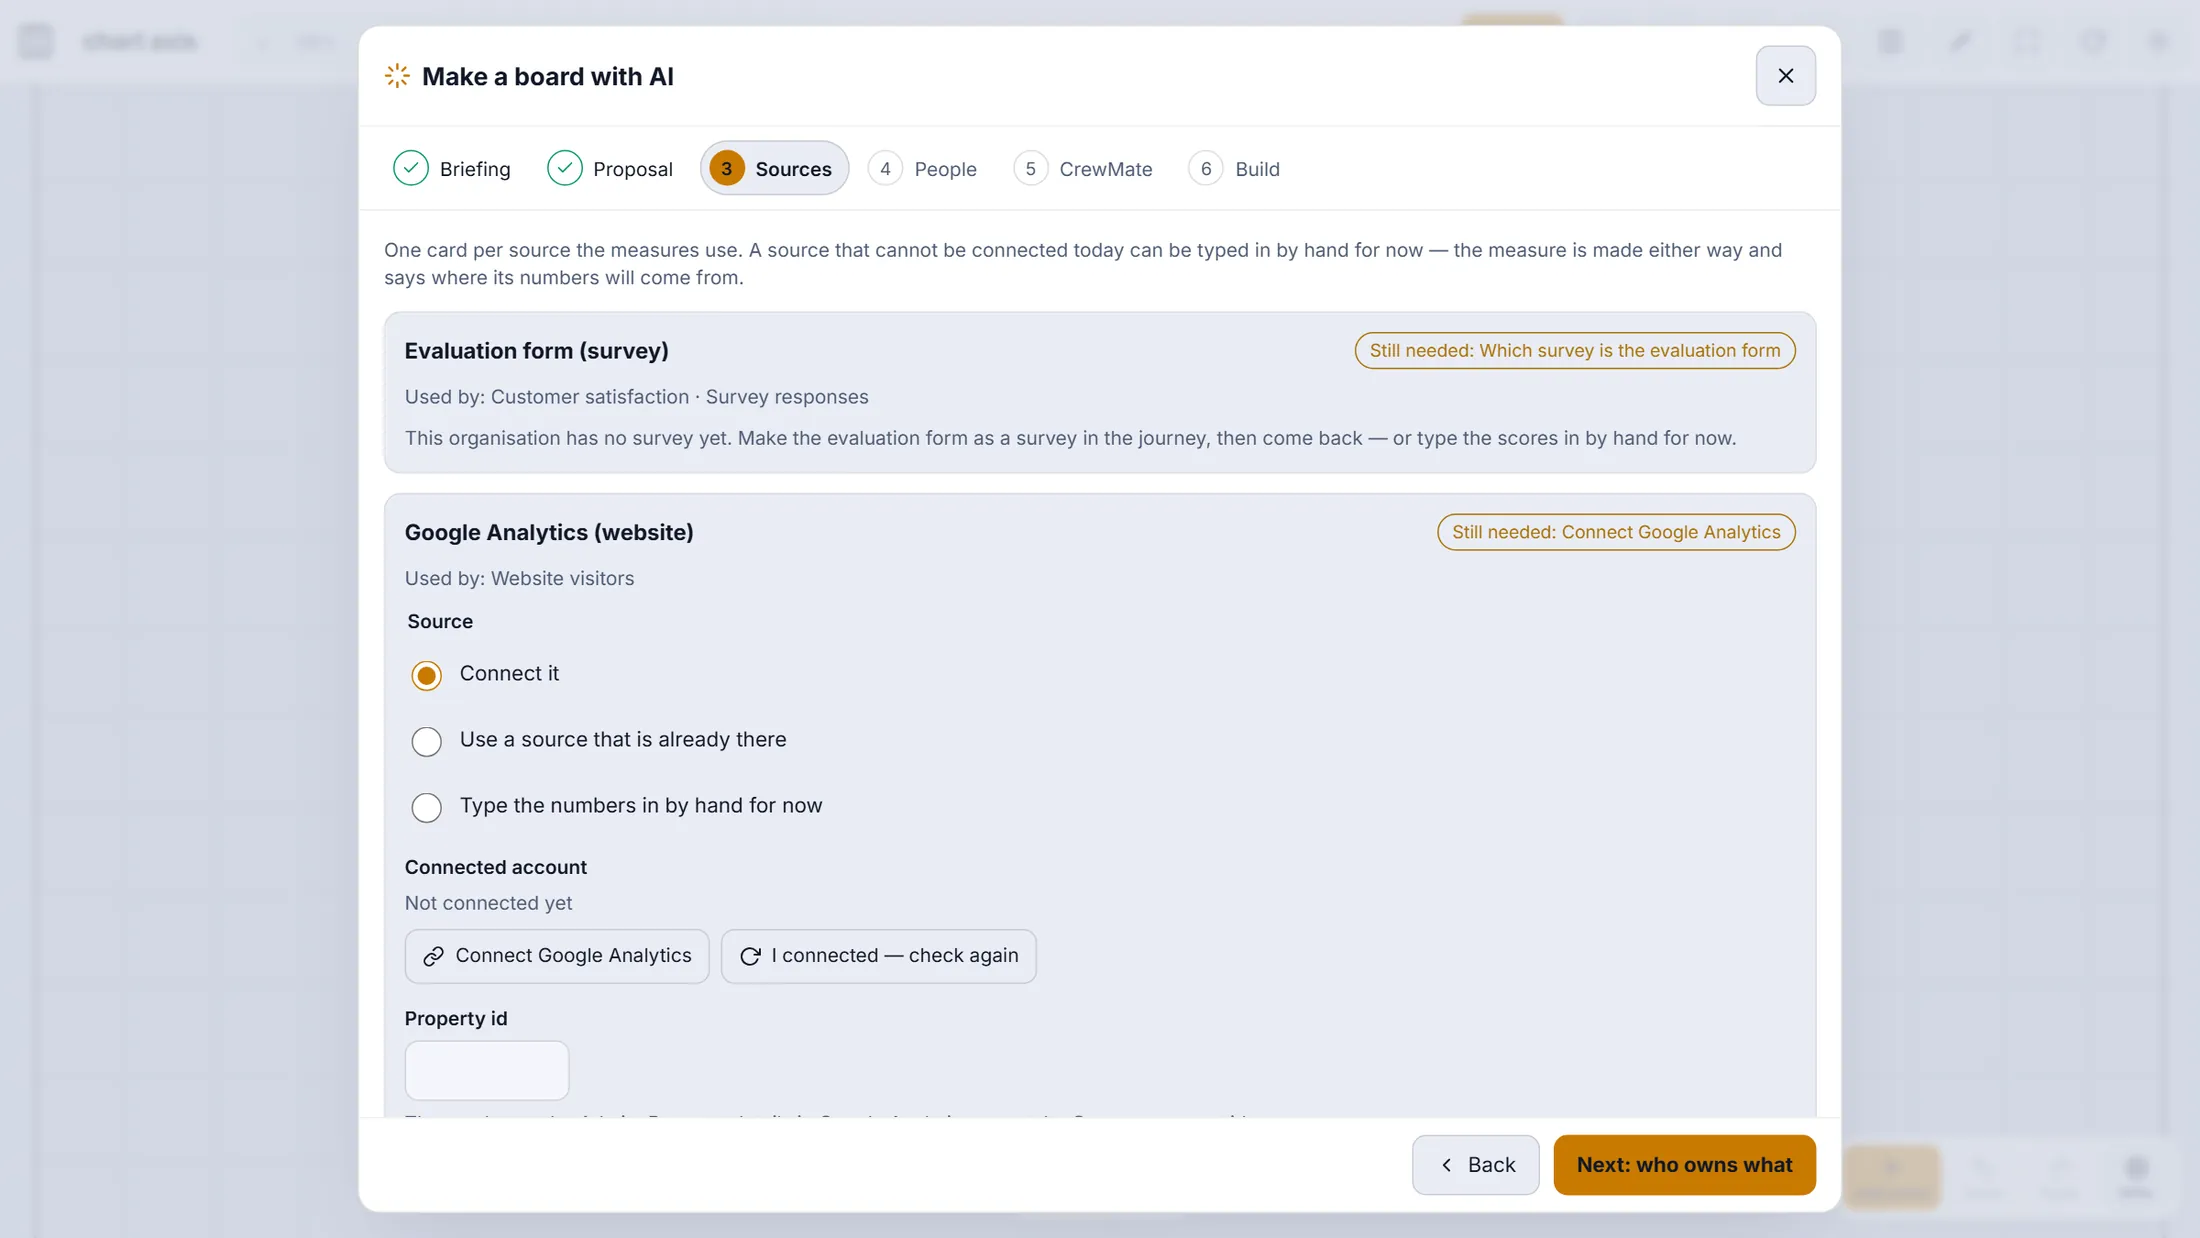
One card per source: what uses it, what is still needed, and how to feed it. Give every number an owner
Each number gets a person. That person may type its values and hears first when it falls behind.
- Per measure, open the list at the right and pick a person. Nobody yet - admins enter it is allowed.
- A measure counted by the platform shows Counted automatically : it needs no owner.
- At the bottom, choose Who may see the board : Everybody in the organisation or Organisation admins only .
- Press Next: build. If a CrewMate step follows, pick a talking CrewMate for the board or press No, without a CrewMate.
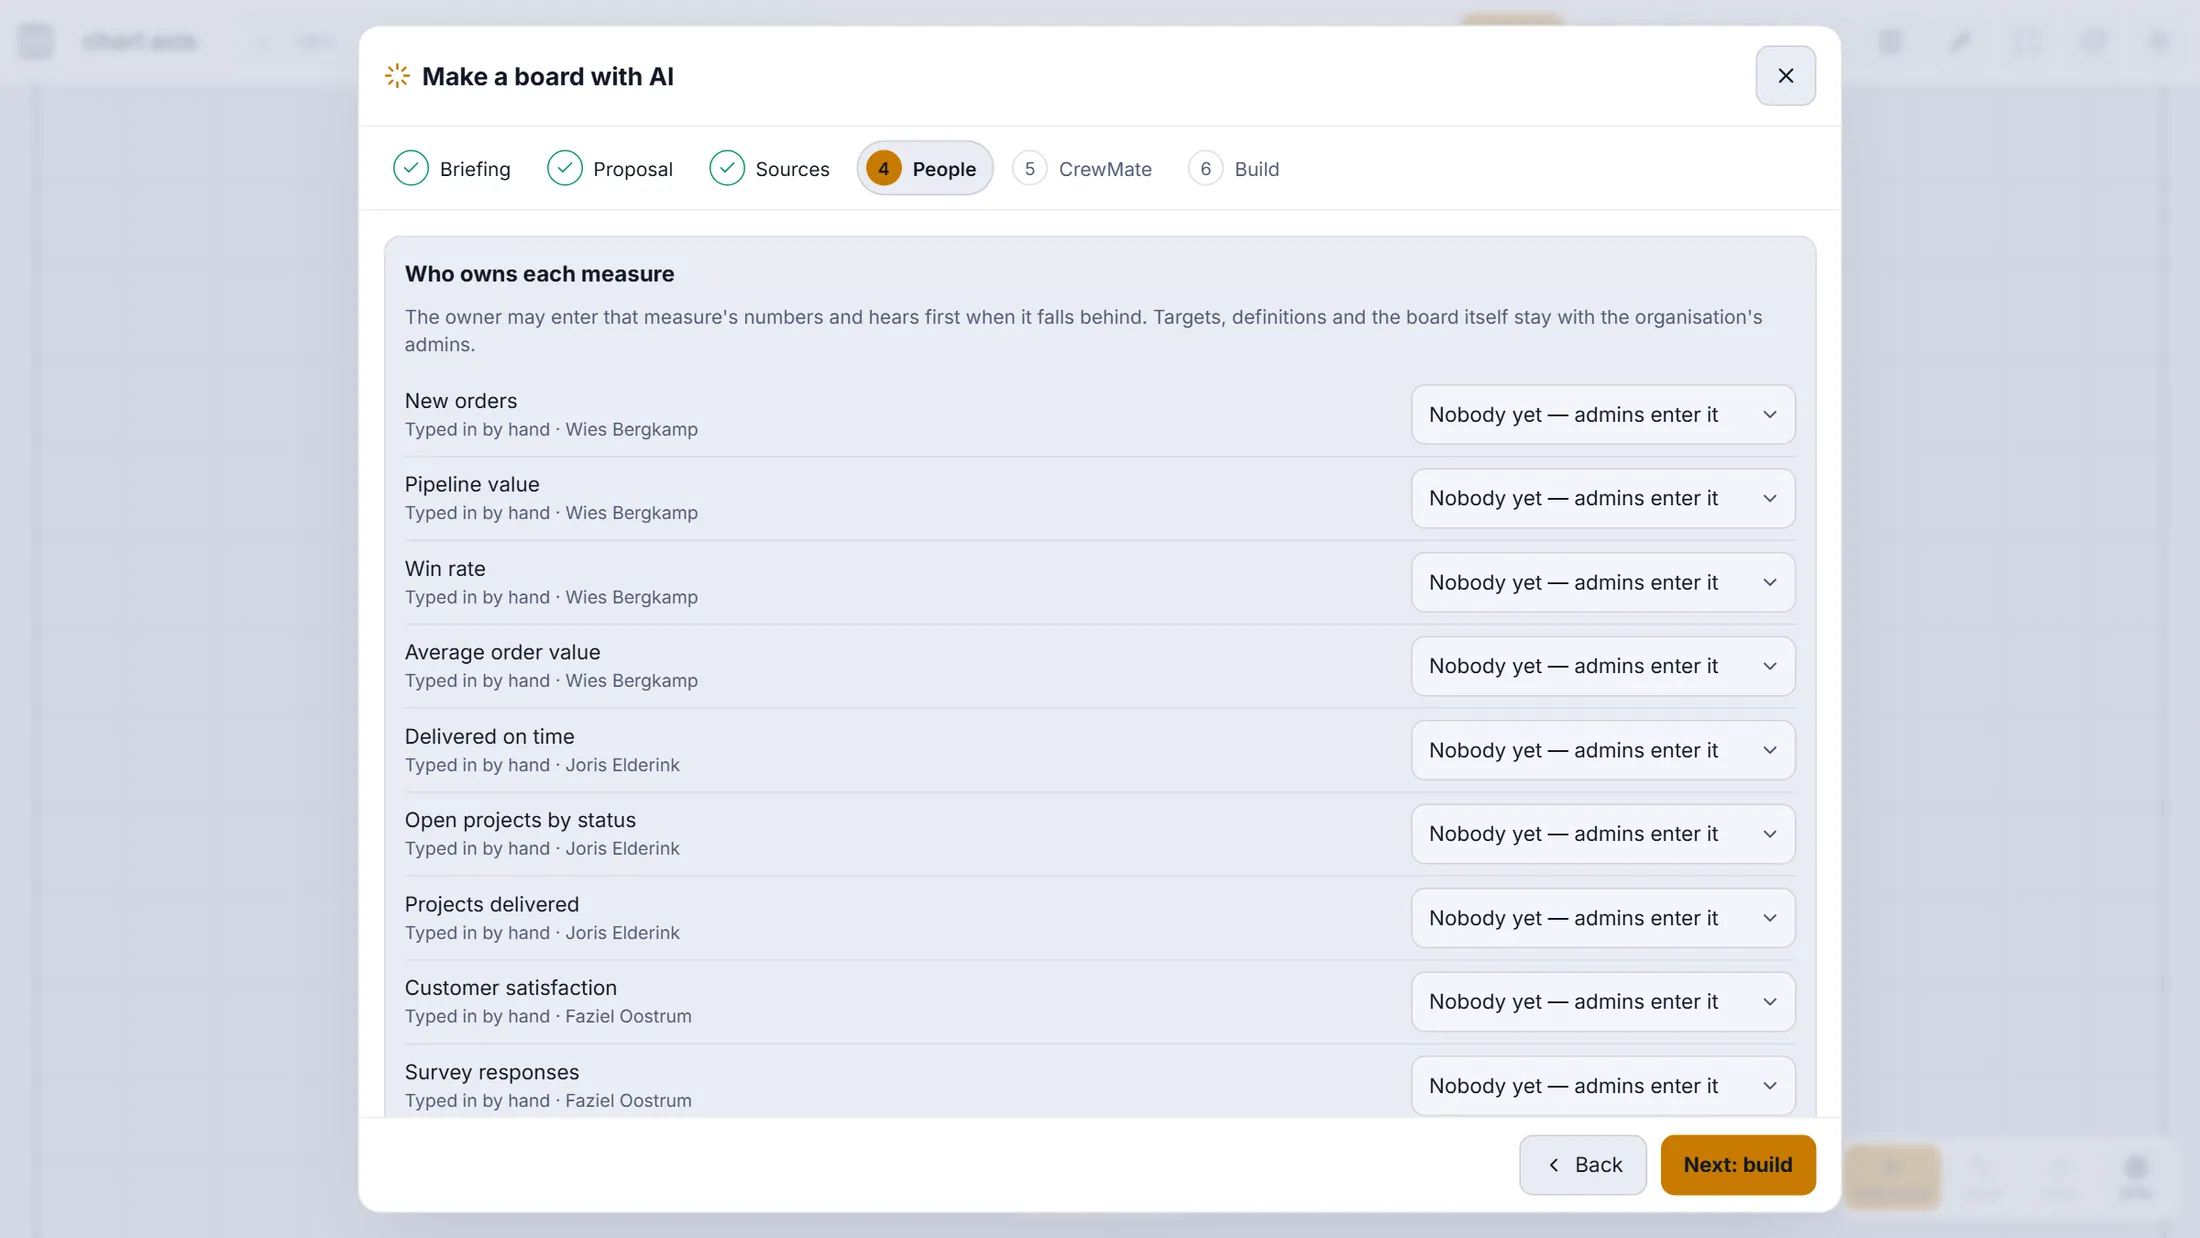
Every measure with a name under it - taken from the briefing - and a list to choose an owner. Look at the sums, press Build
One screen says what will be made. Press the button once.
- Read What will be made : here 1 screen, 2 pages, 19 tiles, 10 measures, 0 connected sources, 10 typed in by hand.
- Press Build the board. The window counts along: Measure 3 of 10 , then Placing the tiles on the screens .
- Wait for The board is ready. Every step in the list has a green tick.
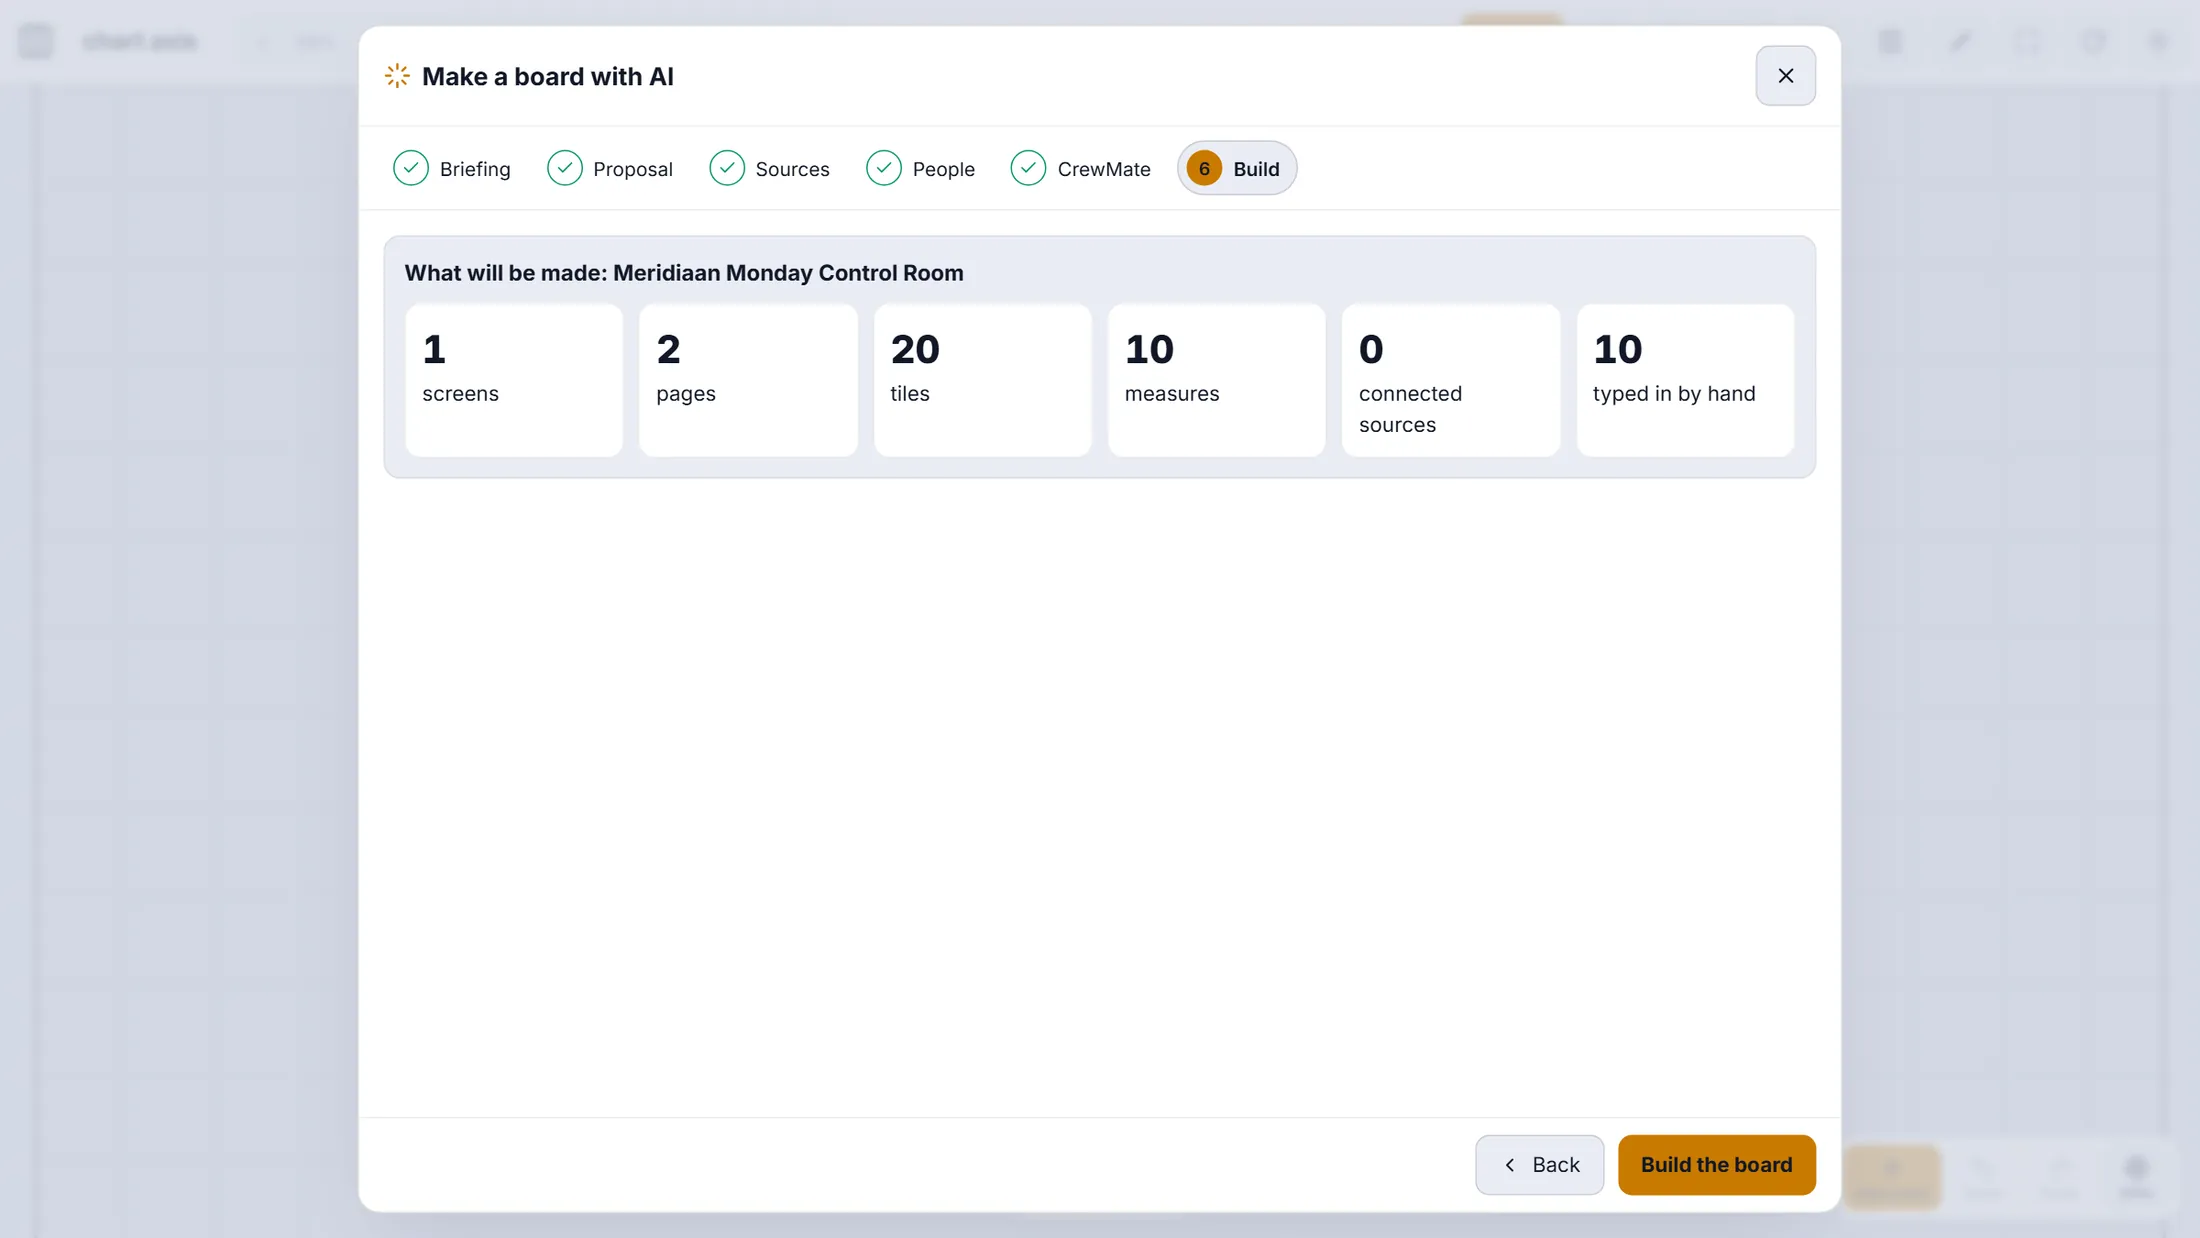
What will be made, in six numbers. The board is ready
A list of green ticks shows what was made. Then press Open the board.
- Look at the list: Measure: New orders , Measure: Pipeline value , ... and Board with its pages and tiles .
- Read Example data is shown until you connect a source. You decide later whether to remove it.
- Press Open the board. Start over would begin a new briefing.
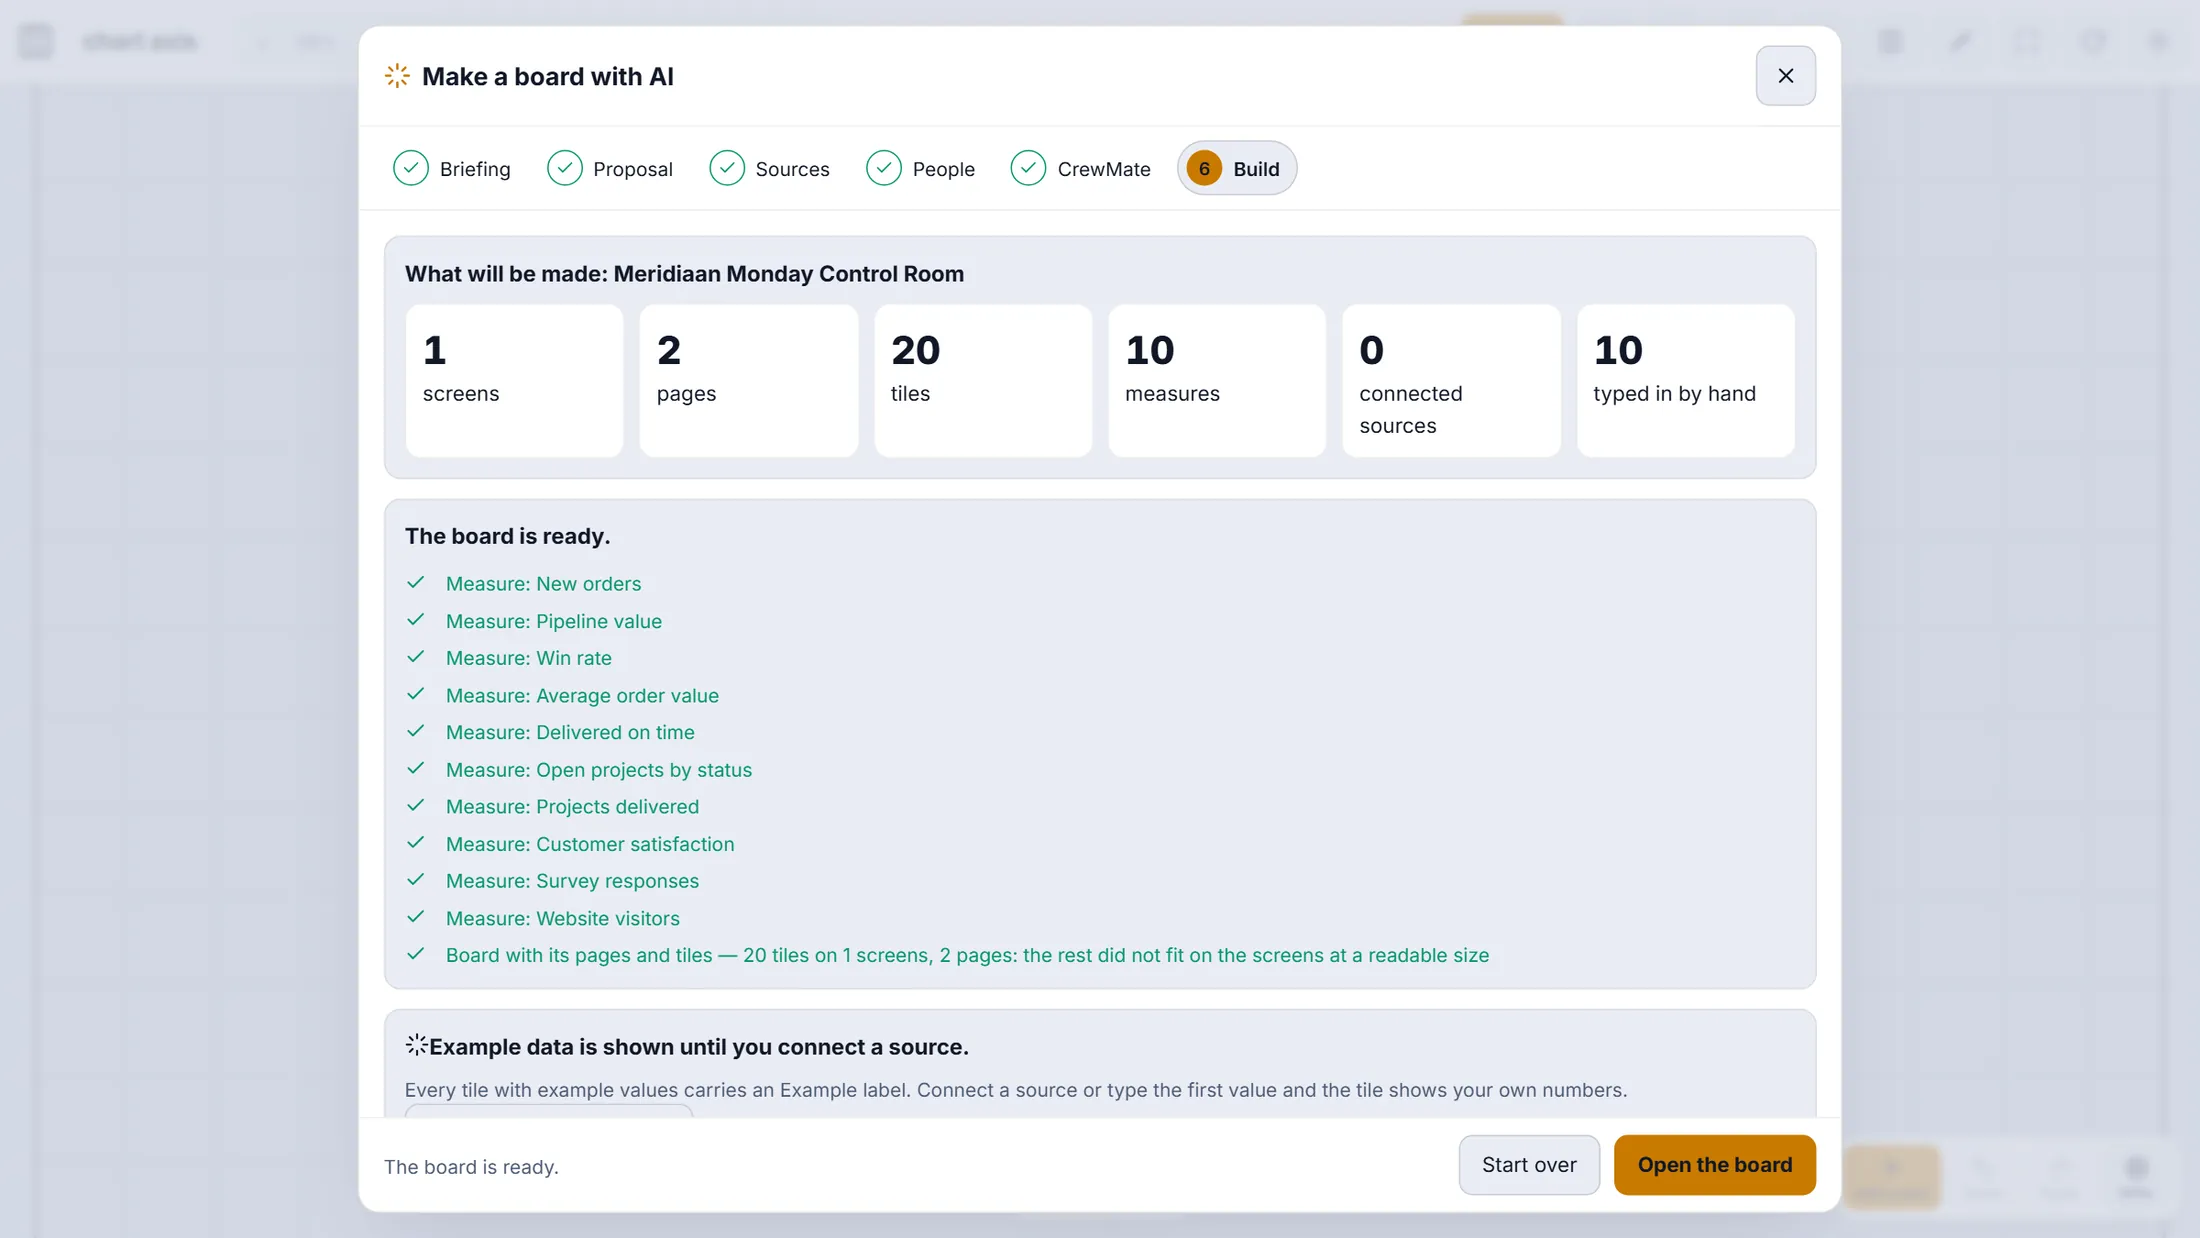
Everything made is listed. The board is saved. Your Control Room
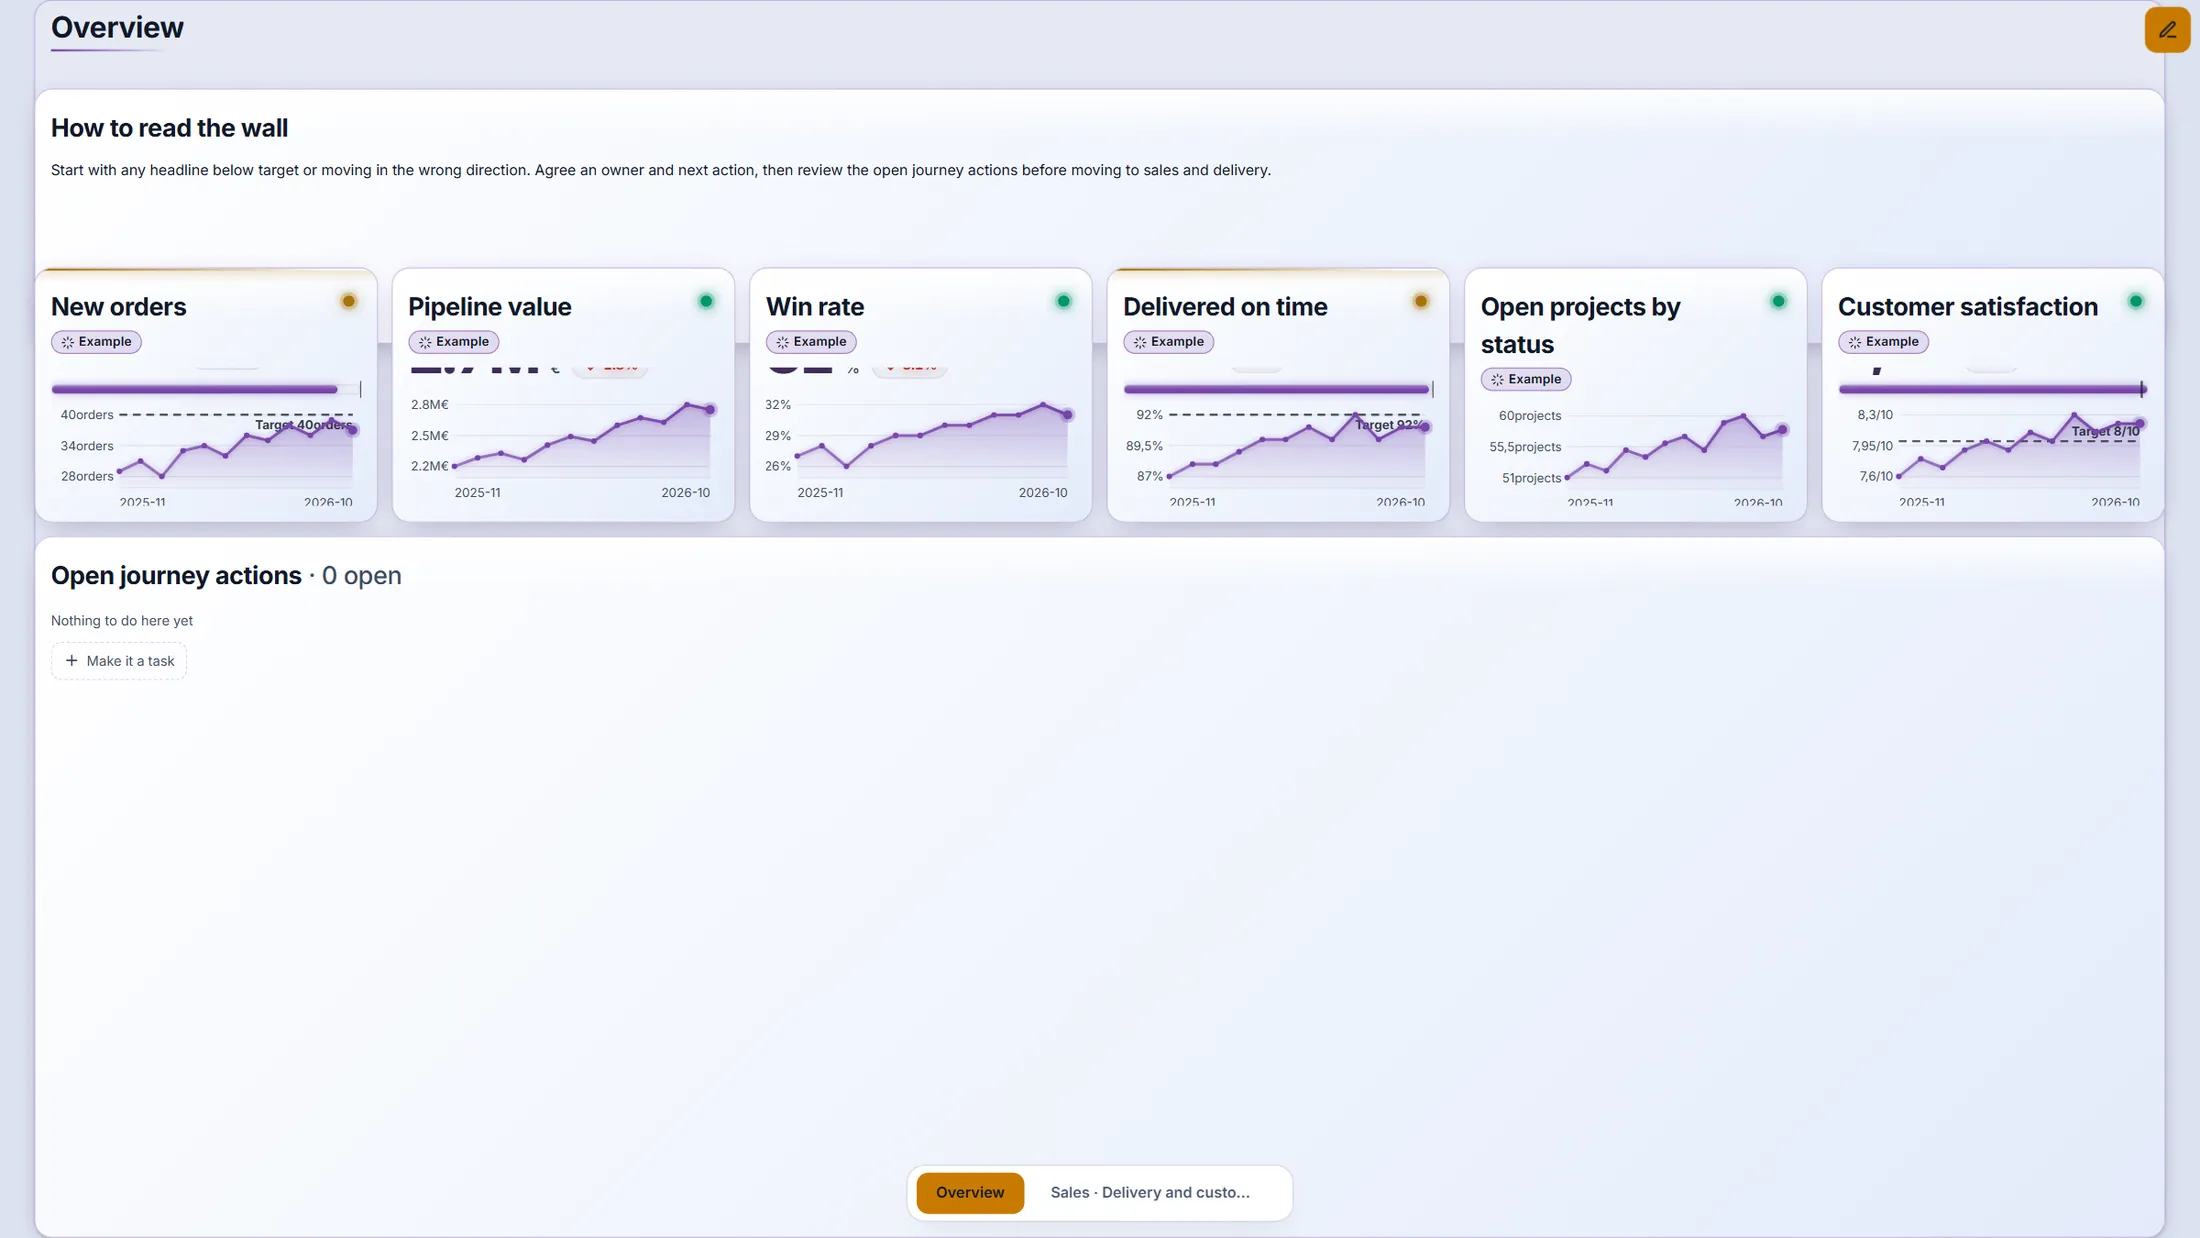
The wall stands: six headline numbers, the open actions, and pages at the bottom.
- Look at the tiles. Each one wears an Example label: the numbers are examples until you connect a source or type the first value.
- The dot at the top right of a tile is its status: green is on track, amber is a little behind.
- Press the other tabs at the bottom to see the pages Sales and Delivery and customers . The next explainer tours everything you can do with them.
The finished board - made from one briefing.
If something is not right
I do not see Make with AI.
Press the pencil (Edit) first - the button only shows in edit mode. If it is still missing, you are not an admin of the organisation: the window would say Only an organisation admin can make a board.
The proposal takes very long.
A long briefing is made in parts: first a plan of the screens, then one screen after another, with a count such as Screen 2 of 4. Leave the window open. If it says Try again, press it - the briefing is still there.
A source says Still needed.
That is allowed. Choose Type the numbers in by hand for now: the measure is made either way and says where its numbers will come from. Connect the source later.
The tiles show numbers that are not mine.
Those are example numbers, each marked Example. They go away when you connect a source or type the first value - or press Remove all example data.
Can I change the board afterwards?
Yes. It is an ordinary board: press the pencil, move and resize tiles, change a tile's source, add tiles. Nothing is locked to the briefing.
The words, in plain language
- briefing
- The text in which you say what the board is for: goal, questions, measures, sources, owners.
- proposal
- The plan CoVince writes from the briefing. Nothing is made until you press Build the board.
- measure
- One number you follow, with a target and an owner (also called a KPI).
- tile
- One box on the board: a gauge, a trend line, a list, a text...
- source
- Where a number comes from: typed by hand, counted by CoVince, a survey, Google Analytics...
- example data
- Made-up numbers on a new tile, marked Example, until your own numbers arrive.
Where to go next
- Control Room - everything it can do Tile types, free layout, data sources, play and phone.
- All explainers The other things you can learn here.